

Contents
1 Overview
There are two different types of cgMLST schemes possible, i.e. stable and ad hoc ones. Stable schemes provide a public expandable nomenclature whereas ad hoc schemes provide a local nomenclature. Defining, evaluating, and calibrating a good stable cgMLST scheme is quite laborious. However, all approved stable schemes are publicly available and downloadable for immediate use. In contrast, users have to quickly establish an own ad hoc scheme.
A cgMLST scheme is usually slightly less discriminatory than a scheme done with an ‘SNP-like’ approach but better suited to do prospective analysis. However, when cgMLST and accessory genome genes of such a scheme are taken for comparative analysis then the discriminatory power is nearly as high as with the ‘SNP-like’ approach.
Stable and ad hoc cgMLST schemes deliver equal good genotyping results when used for analyzing outbreak(s). Of course when using an ad hoc scheme it is by definition not possible to share an allele nomenclature between laboratories. Furthermore, stable cgMLST schemes come with a predefined allele distance threshold for detecting clusters. However, users can define for ad hoc schemes their own thresholds that also will be used to trigger cluster alerts. Finally, the percentage of good cgMLST targets might not be a good quality control parameter if used with an ad hoc scheme if the scheme was not carefully enough defined or applied.
Two different approaches are possible to define an ad hoc cgMLST scheme:
- The single outbreak analysis approach is very similar to the procedure how SNP calling publications are usually done. Here, the researcher first must determine the genetically closest available finished (complete or chromosome) genome, e.g. by an in silico MLST or kmer search, and then use this genome as seed genome without any query genomes for establishing an ad hoc cgMLST scheme. This approach delivers the highest possible discriminatory power but is not well suited to be expanded for the analysis of multiple outbreaks with different genetic background or continuous monitoring.
- The multiple outbreak analysis approach follows in essence at least the step 3 of the stable cgMLST scheme tutorial, i.e. a well-characterized strain is taken as seed genome and usually multiple query genomes are used to establish a potentially stable cgMLST scheme for ad hoc usage with a local nomenclature.
![]() Important: This tutorial only covers the single outbreak analysis approach.
For the multiple outbreak analysis approach follow the chapter 3 of the stable cgMLST scheme tutorial. Alternatively to the here described single outbreak analysis procedure, it is possible to find very fast the closest NCBI Genome with status complete or chromosome by using the Mash Distance tool.
Important: This tutorial only covers the single outbreak analysis approach.
For the multiple outbreak analysis approach follow the chapter 3 of the stable cgMLST scheme tutorial. Alternatively to the here described single outbreak analysis procedure, it is possible to find very fast the closest NCBI Genome with status complete or chromosome by using the Mash Distance tool.
2 Preliminaries
- Installation: This tutorial requires a running Ridom Typer client and server. Start the Ridom Typer server, then start the Ridom Typer client and initialize the database. For evaluation purpose a free evaluation license can be requested.
- Tutorial Data: Download the example data archive Ridom_Typer_Examples_PGM_200bp_N_meningitidis.zip for this tutorial, and extract the zip-file on your computer. The example data contains Neisseria meningitidis PGM 200bp whole genome shotgun (WGS) MIRA assembeled data of 3 samples of a community outbreak that was published by U. Vogel et al. (J. Clin. Microbiol. 50: 1889, 2012). Neisseria meningitidis is used exemplarily for this demonstration. However, by reading this tutorial you should be able to define your own projects for other species.
![]() Important: This tutorial is based on the genomes available from NCBI Genomes in January 2016. In later revisions of NCBI Genomes more complete genomes or chromosomes may be available and the seed genome may have a different number of annotated genes. Therefore a newly created cgMLST scheme may have a slightly different number of genes than the one described in this tutorial.
Important: This tutorial is based on the genomes available from NCBI Genomes in January 2016. In later revisions of NCBI Genomes more complete genomes or chromosomes may be available and the seed genome may have a different number of annotated genes. Therefore a newly created cgMLST scheme may have a slightly different number of genes than the one described in this tutorial.
3 Finding Closely Related Seed Genome
Each cgMLST scheme is based on a seed genome. This seed genome must be annotated. For highest discriminatory power choose a closely related seed strain/genome. In the following MLST is used to find a closely related seed genome. However, other approaches (e.g., kmer) are possible.
3.1 Create MLST Project
- Step 1: Create a new Project by invoking the menu command File | New | Project.
- Step 2: Enter a name for your Project (e.g., Neisseria MLST).
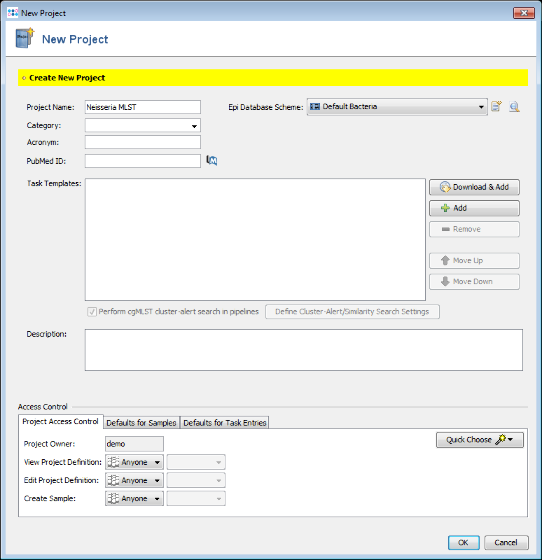
- Step 3: Press
 Download & Add in Task Templates section to open the Download from Task Template Sphere window.
- Step 4: Select the checkbox Show also organisms with MLST only to list all available MLST schemes in the Organism box. Then choose in the Organism box Neisseria spp.
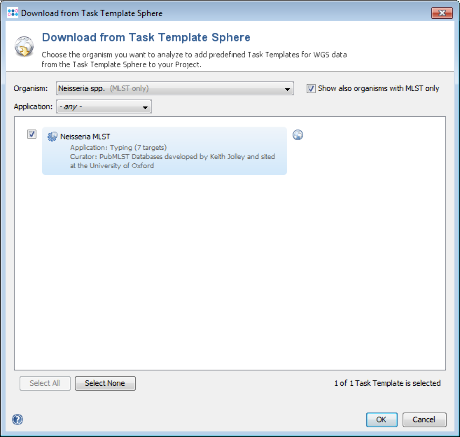
- Step 5: The task template for scheme Neisseria MLST is shown and preselected. Press OK to add it to the new project.
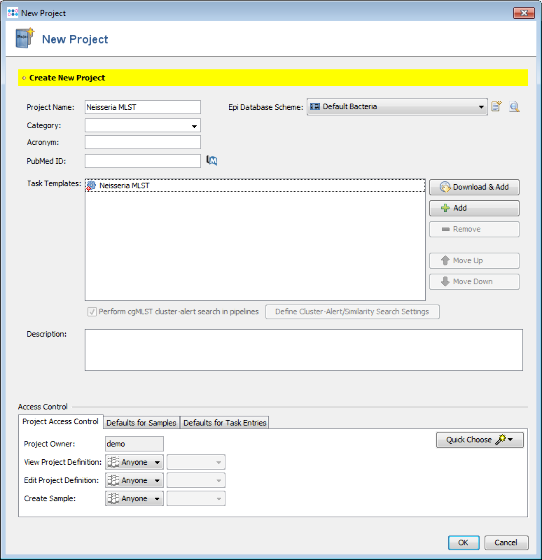
- Step 5: Finally save your Project by clicking OK in the New Project window.
3.2 Add NCBI Genomes to MLST Project
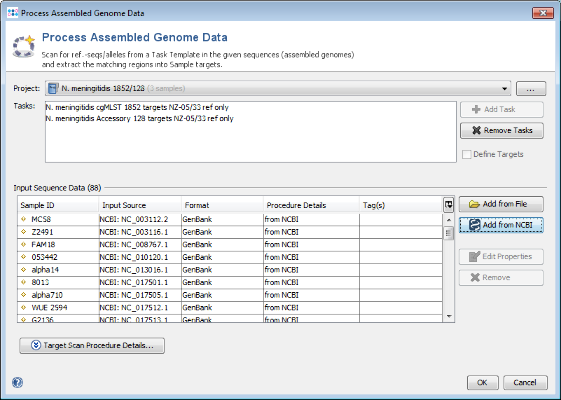
- Step 1: Choose from menu File | Process Assembled Genome Data.
- Step 2: Choose the Project you just created.
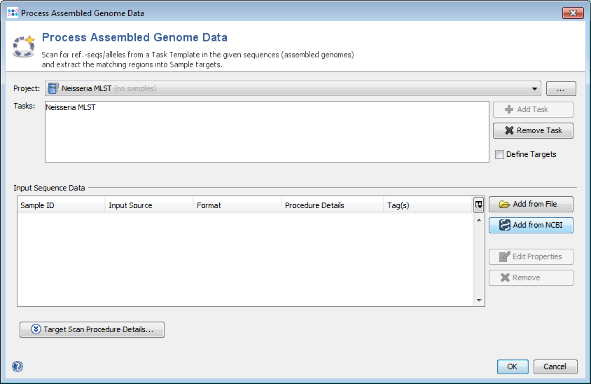
- Step 3: Press
 Add from NCBI
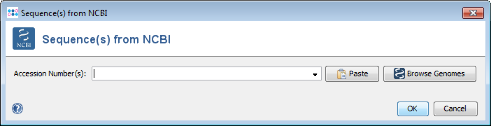
- Step 4: Press the Browse Genomes button. A list of the genomes that are available from NCBI is shown.
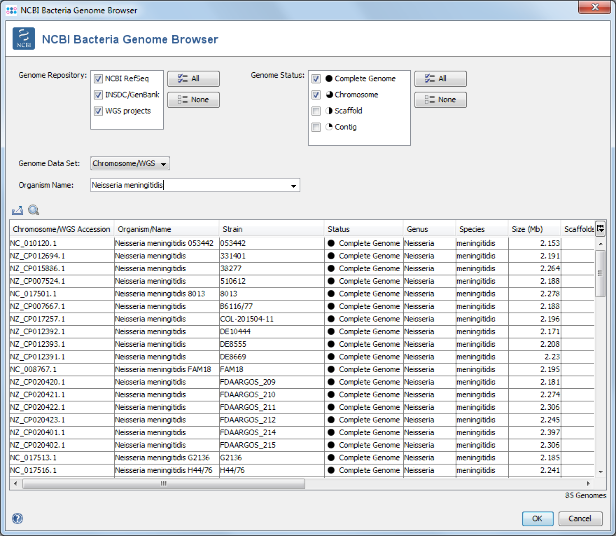
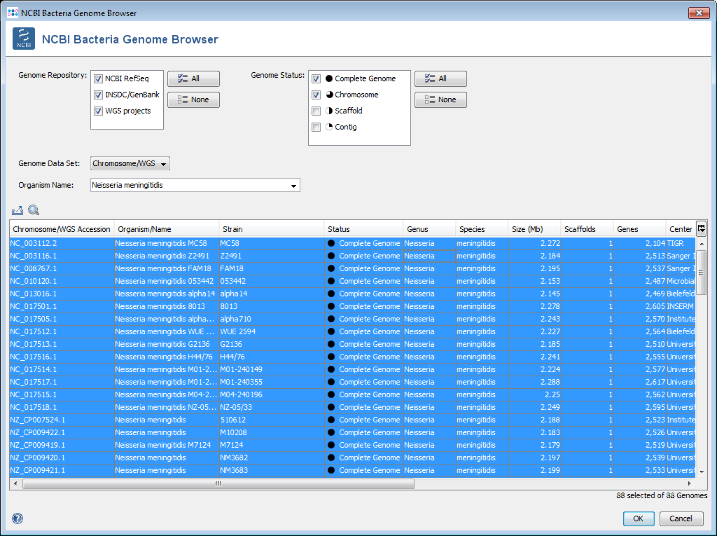
- Step 5: Select only Complete Genome and Chromosome in the Genome Status panel on the upper left. Then choose or enter Neisseria meningitidis in the Organism Name field (use the arrow right key for auto-completion of the name). Select all found genomes (88 as of April 2018; to speed up this tutorial you can only select some genomes) and press OK to copy the accession numbers into the Sequence from NCBI Genomes dialog. In this dialog press again OK to download the genomes.
- Step 6: A preview of the NCBI genome datasets that will be downloaded is shown. Press OK to continue.
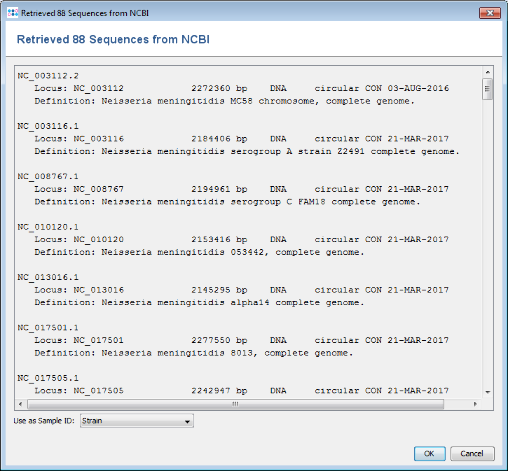
- Step 7: The NCBI genomes are added to the input sequence data list. (Do not yet press the OK button!)
3.3 Add Outbreak Strains to MLST Project
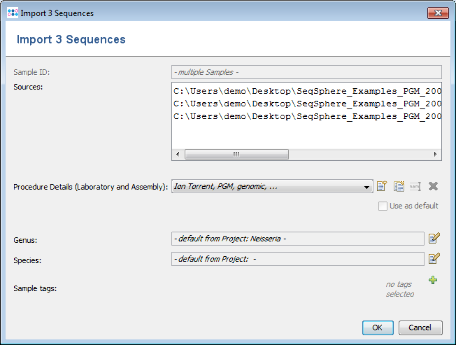
- Step 1: Now use the button
 Add from File and choose the three tutorial FASTA files. These files are de-novo assemblies (done with MIRA) of Ion Torrent data (PGM 200bp).
- Step 2: The upcoming preview window allows among others to specify the laboratory and assembly procedure details for the sequence files. For this tutorial the procedure details are automatically filled by a SPEC file located in the folder of the FASTA files. Confirm the preview window by clicking OK.
- Step 3: The sequence data of the 3 isolates is added to the bottom of the input sequence data list.
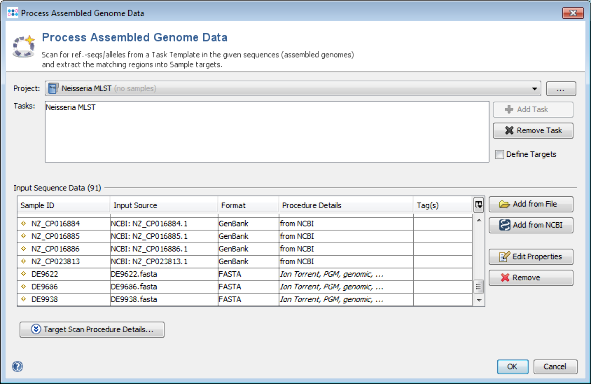
- Step 4: Press OK to start the import.
3.4 Comparing Imported Strains
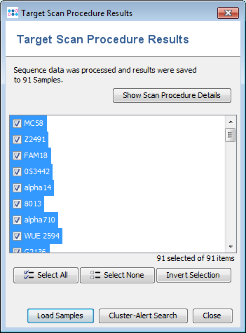
- Step 1: Once the import process is finished after some minutes (depending on the number of NCBI genomes that are downloaded), a list of the imported Samples is shown. Press just Close here, because it is not necessary to open the Samples in the workspace for comparing them.
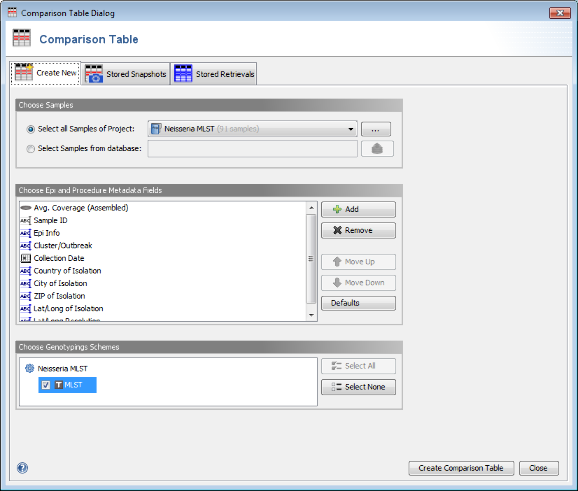
- Step 2: Invoke the menu command Tools | Comparison Table. In the Comparison Table dialog go to the first tab "Create New". In the Choose Samples section select the project Neisseria MLST (should be preselected). Then select MLST in the Choose Genotypings Schemes section at the bottom. Press the Create Comparison Table button to confirm.
- Step 3: A Comparison Table window opens. The table rows are colored by the ST. As can be seen in the ST column all three outbreaks strains share the same MLST ST 42. In this example the NCBI genome of stain NZ-05/33 (NC_017518) has the same ST and can be used immediately as seed genome for a single outbreak analysis approach ad hoc scheme.

- Step 4: If there is no identical ST, press the
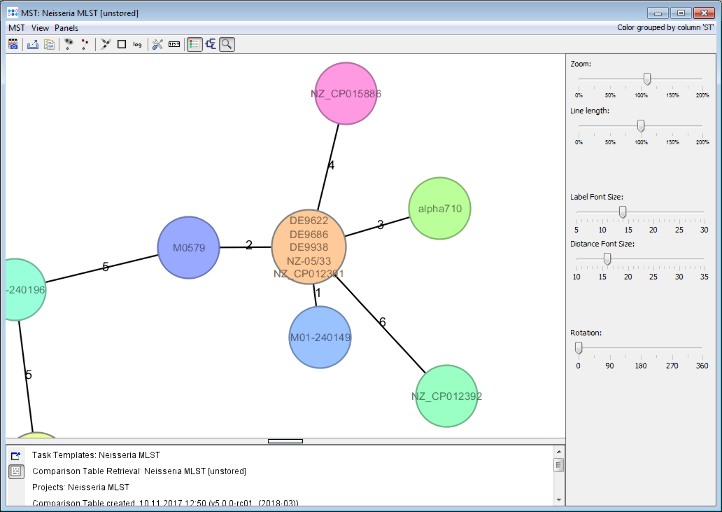
 Minimum Spanning Tree button in the toolbar to draw a minimum spanning tree of all Samples to find closely related ones. For example there is another strain (M01-240149) with only 1 MLST allele difference to the three outbreak strains.
- Step 5: Close the Comparison Table.
4 Creating Rapid Local Ad hoc cgMLST Scheme
- Step 1: Invoke the menu command Tools | cgMLST Target Definer.
- Step 2: Press Get from NCBI in the Seed Genome field and enter the accession number of the found NCBI strain with same ST, i.e., NC_017518. Press OK to retrieve the sequence and insert it as seed genome.
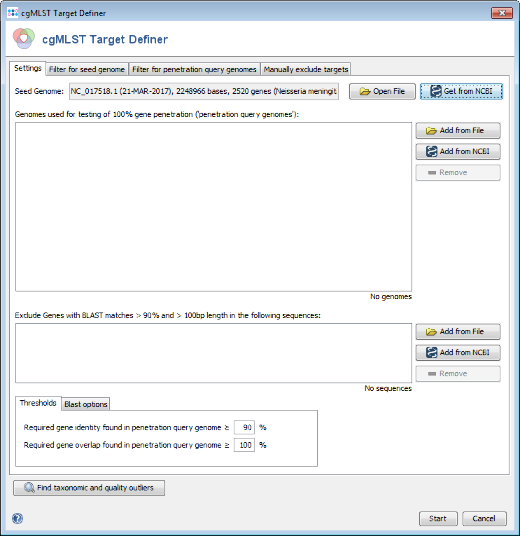
- Step 3: Press the Start button to initiate the target definer process.
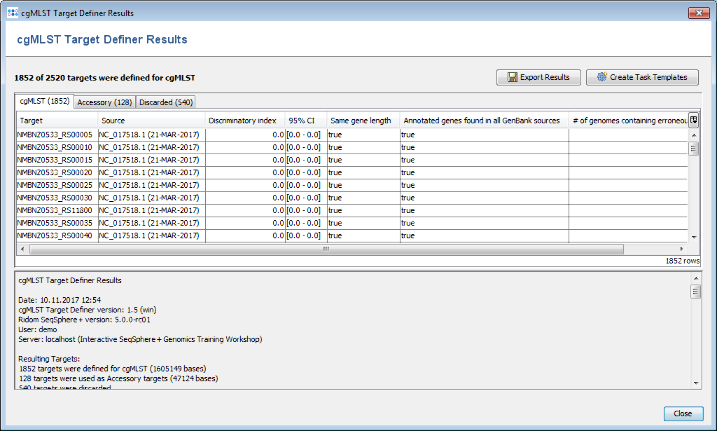
- Step 4: After a minute or so the process is finished and the results are shown. Each of the 2520 genes of NC_017518 (21-MAR-2017) was added to one of the following categories, i.e., cgMLST, Accessory or Discarded.
- cgMLST contains 1,852 genes that are not homologous, do not contain stop codons and do not overlap with other genes. These genes are used as targets for cgMLST.
- Accessory contains 128 genes that are not homologous and do not contain stop codons, but overlap with other genes. By convention, those genes are not used for cgMLST. However, they can be used in addition to increase the discriminatory power if the resolution of cgMLST is not high enough.
- Discarded contains 540 genes that are homologous or contain stop codons. Those genes are not used at all.
- Step 5: Press the button Create Task Templates to create two Task Templates that can be used for analyzing N. meningitidis NGS data. One cgMLST Task Template with 1,852 targets is created. A second Task Template called Accessory is created for the 128 genes of the Accessory category.
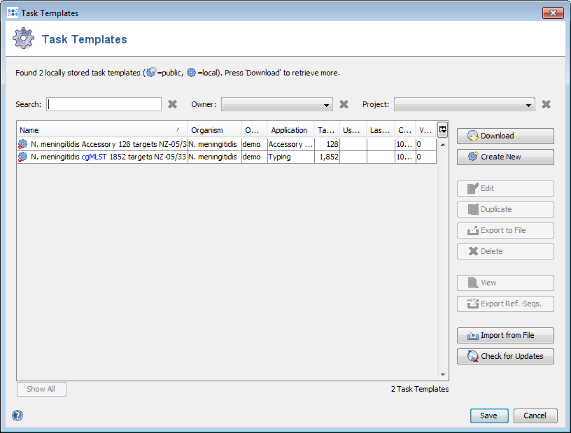
- Step 6: Press the Save button to store the Task Templates.
- Step 7: A new dialog pops-up that allows to immediately create a new Project for the new Task Templates. Press the Yes button to open the editor for the New Project. The proposed name of the project can be changed. Confirm with OK to save the New Project.
- Step 8: Close the cgMLST Target Definer Results window.
![]() Hint: Ridom Typer is a re-sequencing software. Once you have setup your Project with the Task Templates you can literally analyze hundreds/thousands of sequence data automatically.
Hint: Ridom Typer is a re-sequencing software. Once you have setup your Project with the Task Templates you can literally analyze hundreds/thousands of sequence data automatically.
5 Analyzing Outbreak Data with the Ad hoc cgMLST Scheme
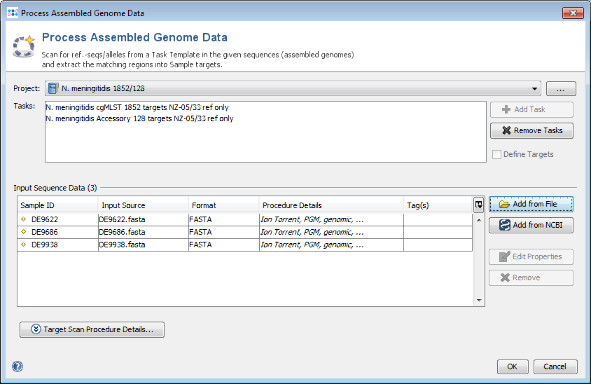
- Step 1: Choose from the menu File | Process Assembled Genome Data. The new cgMLST project you just created and the two Task Templates should be preselected otherwise select this Project. Now use the button Add from File and choose the three tutorial fasta-files. These files are de-novo assemblies (done with MIRA) of Ion Torrent data. Press the Open button. The upcoming window optionally allows to specify among others the procedure details. For now just click OK in this dialog. The files are added to the Input Sequence Data list. Press in the Process Assembled Genome Data window the button OK to start the import process.
- Step 2: Ridom Typer now loads all input sequences and finds (by using built-in BLAST) each of the target reference sequences that are defined in the Task Template (i.e., the alleles of the seed genome). After this step has been done, a Genome Scan Results window is shown. Close this dialog.
- Step 3: Invoke the menu command
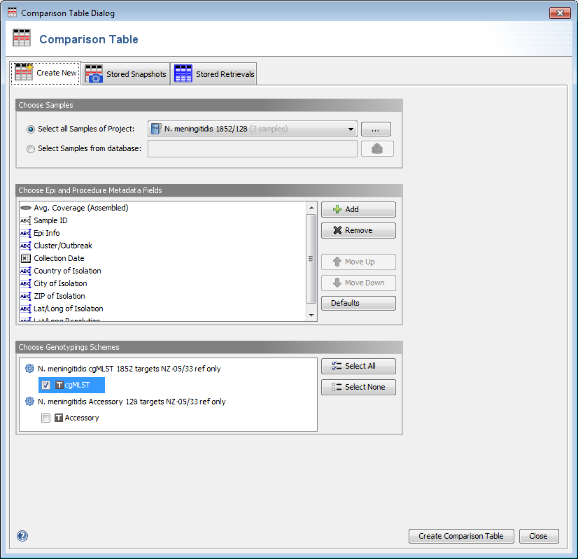
 Tools | Comparison Table. In the Comparison Table dialog go to the first tab "Create New". In the Choose Samples section the new cgMLST project (should be preselected). In the Choose Genotypings Schemes section at the bottom cgMLST should already be preselected. Press the Create Comparison Table button to confirm.
- Step 4: The comparison table is opened and shows the data for the three Samples. The columns with a green header are used for distance calculation. Table cells with red background contain missing values. Those appear if a cgMLST target was not found at all in an input sequence ("? (not found)"), if the analysis for this target has failed, e.g., because of a frame shift error ("? (failed)"), or if a new allele for this target has not yet been submitted ("? (new)").
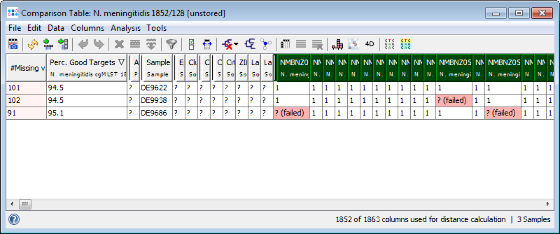
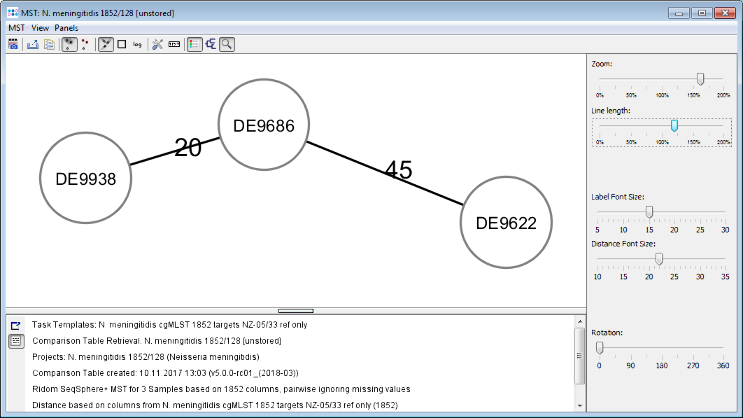
- Step 5: Press the Minimum Spanning Tree button in the toolbar to calculate the distances between the Samples and draw a minimum spanning tree for them. If the table contains missing data (targets that have no allele types assigned yet) a Missing Values Found dialog opens. Confirm in this dialog the default setting that is to pairwise ignore missing values in distance calculations by pressing the OK button. As can be seen in the tree especially the strain DE9622 of this outbreak is quite far distant in this rather non-clonal species.
FOR RESEARCH USE ONLY. NOT FOR USE IN CLINICAL DIAGNOSTIC PROCEDURES.