Contents
Overview
This tutorial describes how to use the Ridom SeqSphere+ software to assembly and analyze bacterial genomic data using the SeqSphere+ Pipeline Mode.
Listeria monocytogenes is used exemplarily for this demonstration. However, by reading this tutorial you should be able to define your own projects for all species with a public available cgMLST scheme in the Task Template Sphere. If you are analyzing a species for which no public cgMLST is available yet, please take a look at Core Genome MLST Schemes help.
This tutorial requires the 64-bit version of Ridom SeqSphere+ and at least 8 GB RAM!
Preliminaries
- Installation: This tutorial requires a running SeqSphere+ client and server. Start the SeqSphere+ server, then start the SeqSphere+ client and initialize the database. For evaluation purpose a free evaluation license can be requested.
- Tutorial Data: Download the example data archive SeqSphere_Examples_Pipeline_L_monocytogenes.zip (142MB) for this tutorial, and extract the zip-file on your computer. The example data contains whole genome shotgun (WGS) data for 2 isolates of Listeria monocytogenes.
Define Pipeline Script
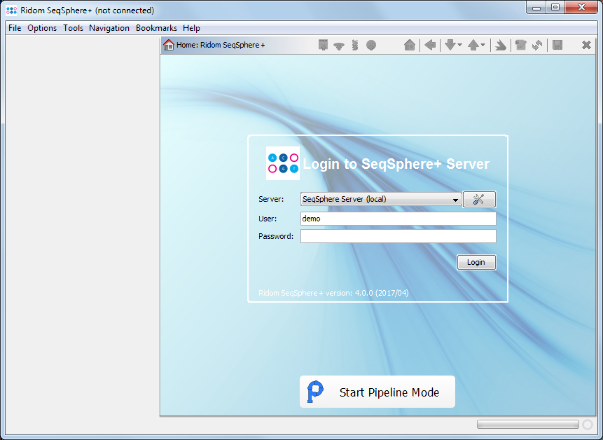
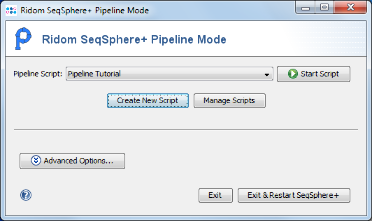
- Step 1: The pipeline mode is designed to run SeqSphere+ in a non-interactive way, therefore no interactive login session is required here. Start the Ridom SeqSphere+ client without logging in, and press the button
 Start Pipeline Mode on the bottom of the login panel or use the identical menu function in the File menu.
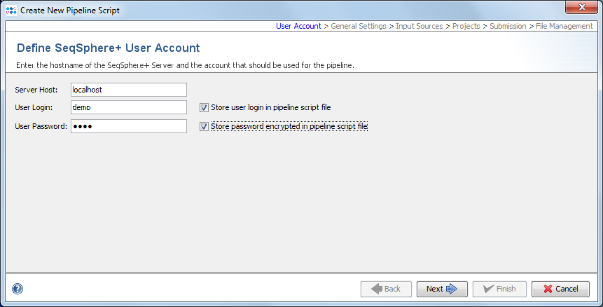
- Step 2: The pipeline mode window starts up. Press Create New Script to start the dialog. At first the Server Host and the User Login must be defined. Just use the normal SeqSphere+ user account that you have just used for login. By default the user login is stored in the script. Enter the User Password too. If wanted, the password can also be stored (encrypted) in the pipeline script. However, it should be taken into account that if the password is stored in the pipeline script anyone with access to the computer can run the pipeline. For this demonstration check the Store password encrypted in pipeline script file checkbox.
- Press Next to move on.
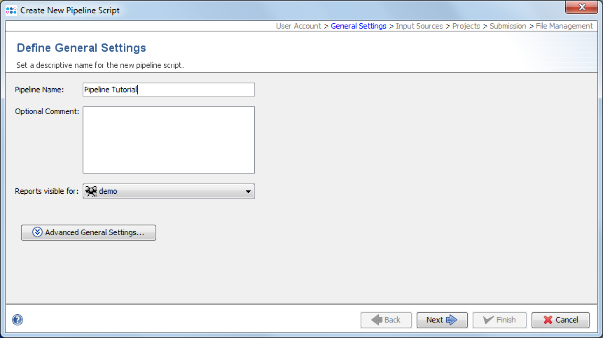
- Step 3: In the Define General Settings panel enter a Pipeline Name (e.g., 'Pipeline Tutorial'). Below the name and comment fields some additional settings can be configured. For this tutorial they can be ignored.
- Press Next to move on.
- Step 4: In the next panel the Input Sources are selected. Press the Folder button and select the directory SeqSphere_Examples_Pipeline_L_monocytogenes that was unpacked from the downloaded tutorial data file (see Preliminaries). The preview section shows the 4 fastq.gz files that are currently in this directory. However, when the pipeline is started all files in this directory will be processed. The pipeline can also be used to monitor a directory for new files and automatically process them.
![]() Important: FastQ files with adapters (& multiplex indices) trimmed-off are required here for optimal de novo assembly results.
Important: FastQ files with adapters (& multiplex indices) trimmed-off are required here for optimal de novo assembly results.
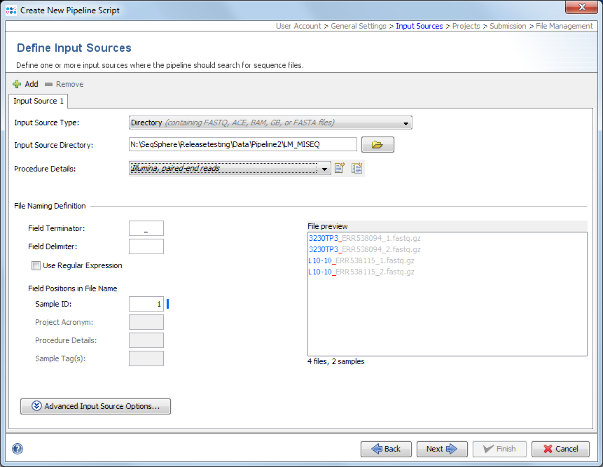
- Step 5: The Procedure Details must be selected the sequence data files. For this tutorial data select Illumina, paired-end reads.
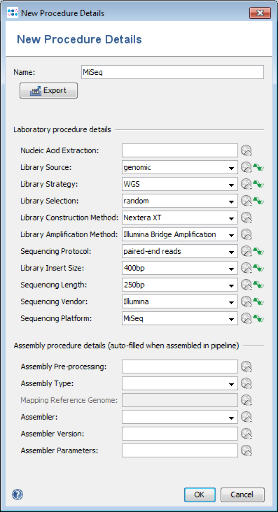
 Hint: If already an appropriate details set was defined previously simply select it otherwise push the
  New Procedure Details button. A New Procedure Details window pops-up. Enter at least Library Source: genomic, Library Strategy: WGS, Library Selection: random, Sequencing Protocol: paired-end reads, Library Insert Size: 400bp, Sequencing Length: 250bp, Sequencing Vendor: Illumina, and Sequencing Platform: MiSeq. The assembly procedure details can be left empty as they are filled-in when using the assembly pipeline. Press the OK button of the New Procedure Details window. Push also the OK button of the Manage Procedure Details window
- Step 6: Each input source must also have a File Naming Definition that describes at least how to find the Sample ID in the file names of your sequence data. The Field Terminator is automatically filled with the underline (_) symbol. You can leave this to default for the tutorial data. Press Next to move on.
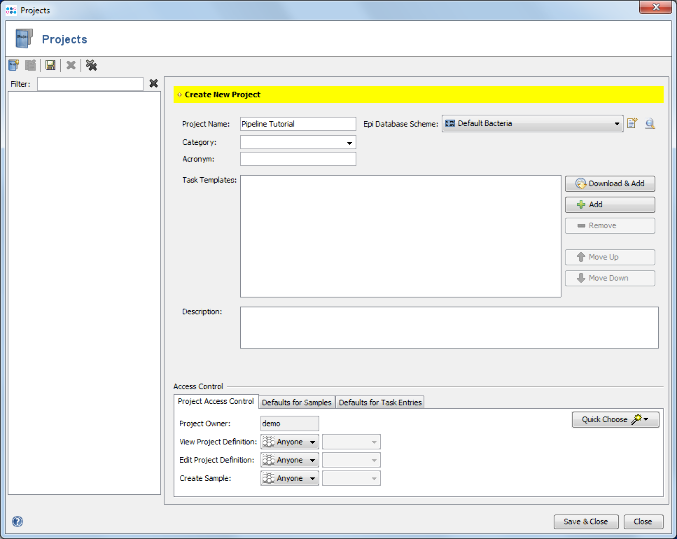
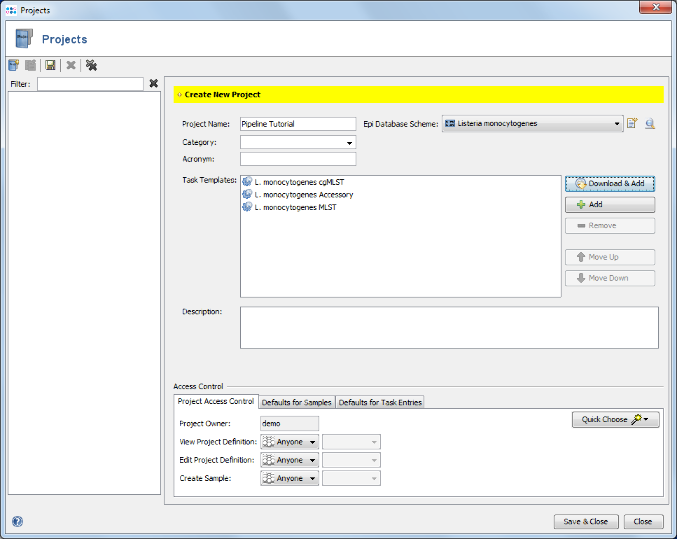
- Step 7: In the next Define Projects panel the Project(s) are selected into which processed Sample data should be imported. For this tutorial the Project does not exist yet, and must be created. Therefore, press Projects in Database in the upper right of the window. Press the Create new Project icon to start defining a new project.
]
- Step 9: Enter a name for the new Project (e.g., Pipeline Tutorial). Then press
 Download & Add in Task Templates section to browse the Task Template Sphere.
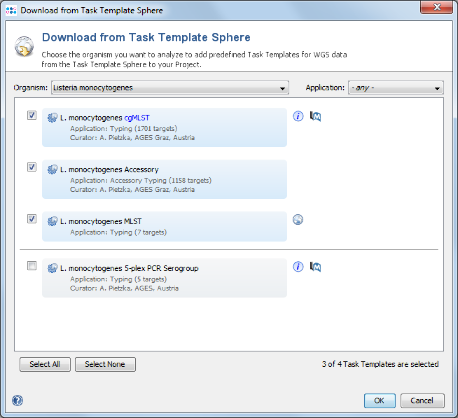
- Step 10: Choose as organism Listeria monocytogenes. There are three Task Templates available for L. monocytogenes, i.e., cgMLST, Accessory and MLST. The cgMLST Task Template defines the 1,701 genes of the reference strain EDG-e that are used for the public nomenclature and for the definition of the cluster type. The Accessory Task Templates defines in addition 1,158 genes that do not belong to the core genome. However, they can be used to increase the discriminatory power if the resolution of cgMLST is not high enough.
- Step 11: The three Task Templates are preselected by default. Press OK to download and to add them to the Project. Finally confirm with Save & Close to save the new Project.
- Step 12: Select the just created project in the Project Name section of the Define Projects panel.
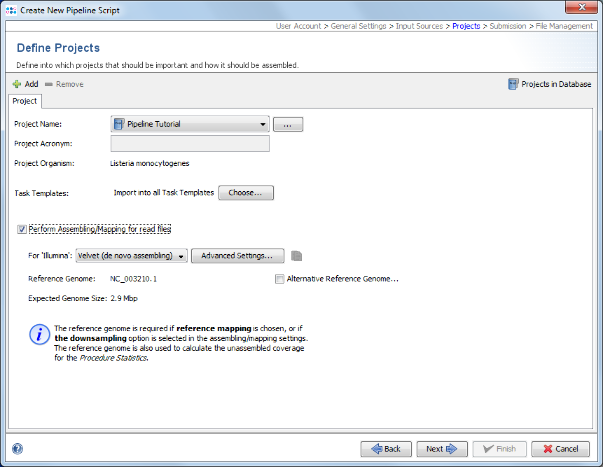
- Step 13: The reference genome for L. monocytogenes that is used as reference for downsampling is automatically loaded from the cgMLST task template in the project. Check the box Perform Assembling/Mapping for read files. For this tutorial leave the setting to default for de novo assembling using Velvet.
- Press Next to move on.
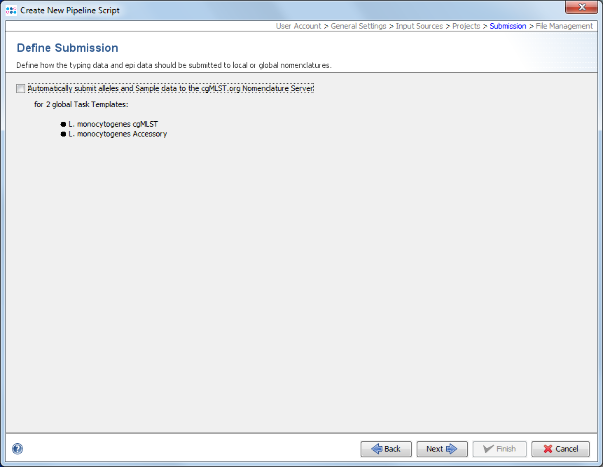
- Step 14: In the upcoming Define Submission panel it can be defined if the pipeline should automatically submit the samples and alleles to the public cgMLST Nomenclature Server. The submission to the nomenclature server is not intended for this tutorial. Therefore, the option Automatically submit alleles and Sample data to Nomenclature Server should be unchecked.
- Press Next to move on.
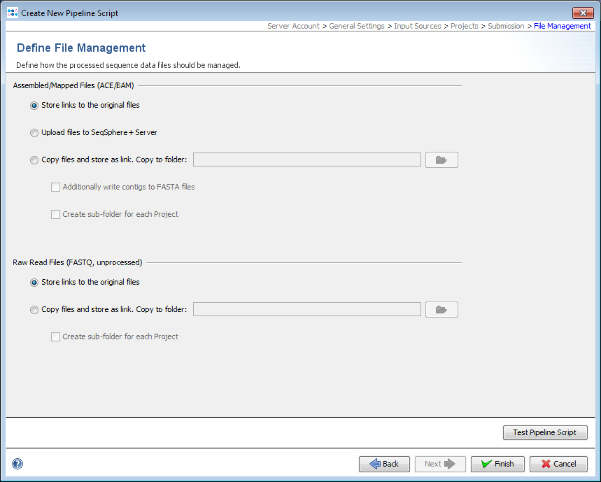
- Step 15: Finally in the Define File Management panel it can be defined what the pipeline should do with the created assembly files and raw reads. Leave all to default and press Test Pipeline Script to validate your pipeline.
- Step 16: The test should finish successfully. Press OK to close this dialog. Now press Finish to store the new pipeline script. A Assembly File Storage dialog pops-up to inform that the assembly file with the reads will not be kept. Press the OK button to confirm the dialog. Push the button Close of the Manage Pipeline Scripts window.
Run the Pipeline
- Step 1: Now press the button
 Start Script to run the pipeline for a selected pipeline script.
- Step 2: The blue colored progress window is opened, showing the current status of the pipeline.
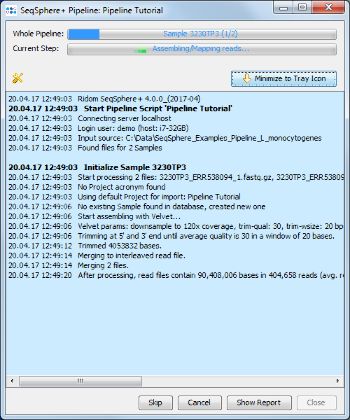
- Step 3: When the pipeline has finished after quite some time (depending mostly on the RAM and number of cores of your hardware) the background color turns to white. Press the Show Report button to see a quick overview for the statistics of the two processed Samples.

- Step 4: Close the report window, press Close in the pipeline progress window, and exit the pipeline mode with the button Exit and Restart SeqSphere+.
Opening the Imported Samples
To see further details about the pipeline run and the imported Samples you can now switch back to the normal interactive login session mode.
- Step 1: The SeqSphere+ Client login window appears again. Log-in with your user account.
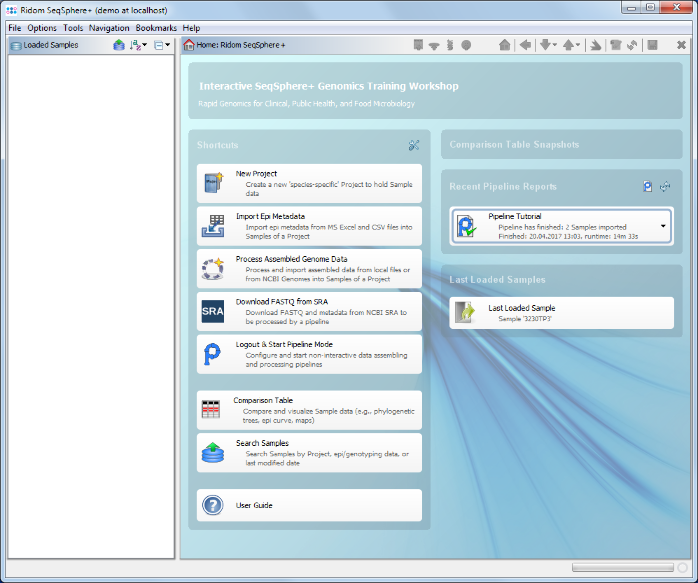
- Step 2: On the right of the home screen in the section Recent Pipeline Reports an item for the new report is shown. Click it to open the report, or use the menu function
 Tools | Browse Pipeline Reports to list all reports.
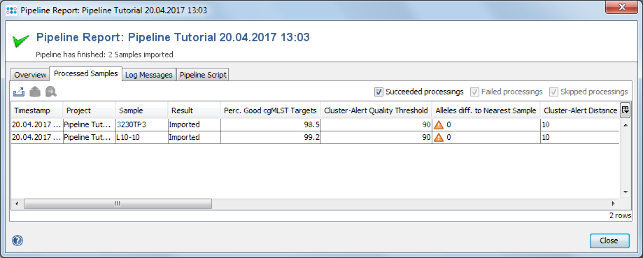
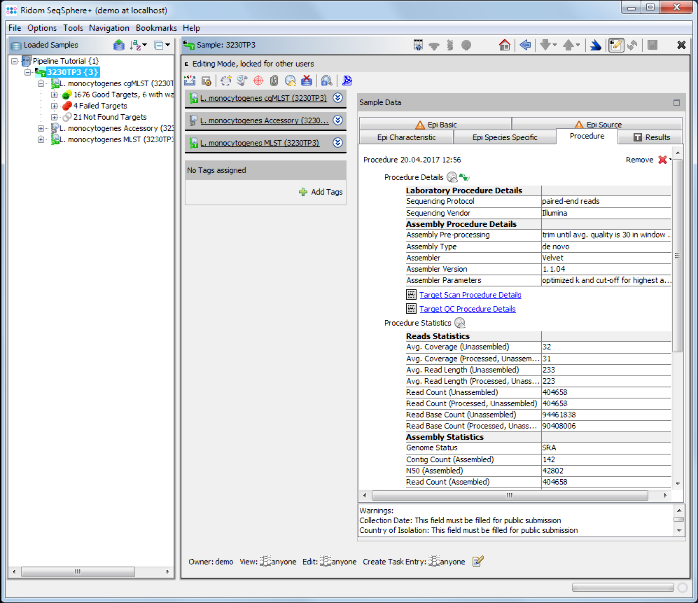
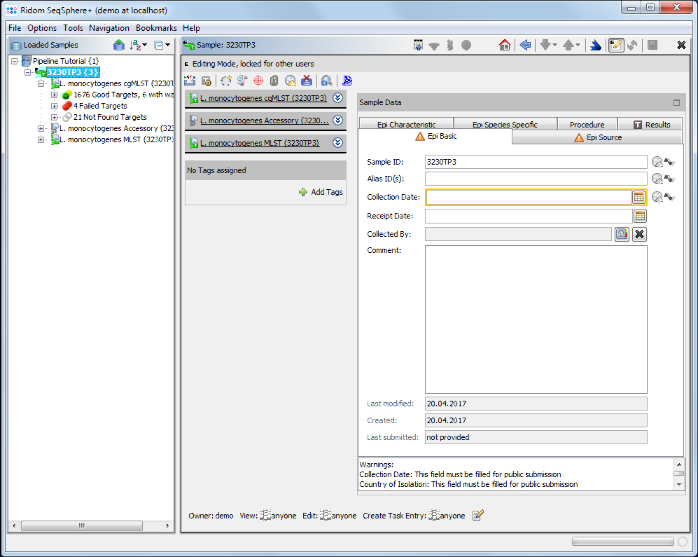
- Step 3: The report is the same as the one shown just before. But because you are logged in now, you can open the Samples in your workspace. Go to the Processed Samples section and double-click on the first sample and close the pipeline report windows. The Sample is shown in the workspace.
- Step 4: Click on the Procedure tab in the right panel of the window see the details about the sequence data and processing.