

Import Seed Genome
There are two ways to import the seed genome sequence:
- Press the button
 Retrieve sequence from NCBI Genbank to download a published sequence from NCBI GenBank, referenced by its accession number (e.g. NC_002695)
- or
- Press the button
 Open sequence from file to load it from a local GenBank file.
Only the GenBank file format (.gb/.gbk) is supported here, because the file must contain feature annotations.
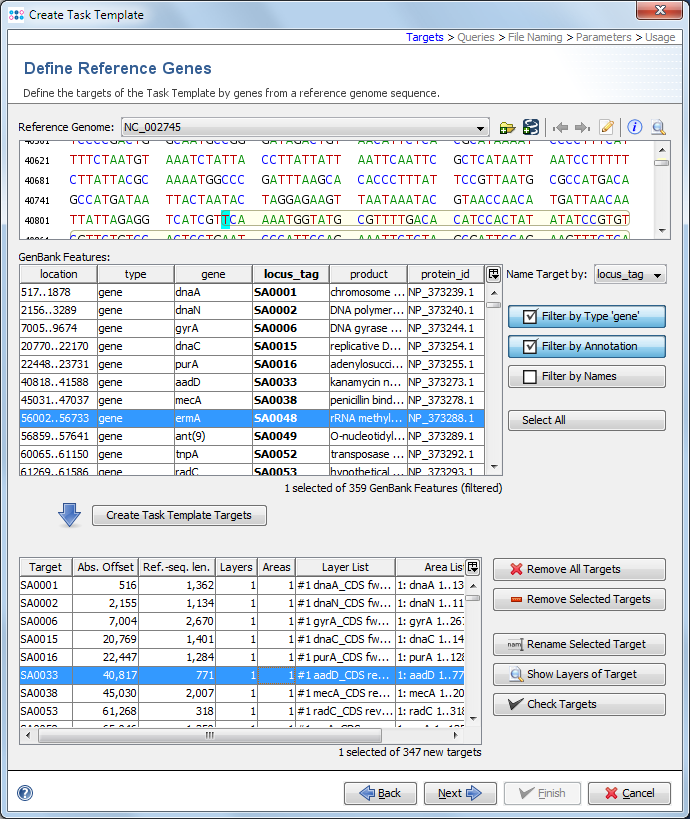
Filter and Select GenBank Features
After the genome sequence is successfully loaded, the list of features that were found are listed in the table below the sequence. These features can now be used to define targets in the Task Template. See the NCBI documentation for a more detailed description of the meaning of different feature annotations.
By default, the feature annotation locus_tag is used as the name of a feature. This can be changed to other annotations like gene. However, every feature that should be used for the Task Template must have a unique name.
To limit the overview of the several thousand features this table can be filtered in several ways:
- Filter by Type: Show only features that belong to a specific type. Available are all feature types that appear in the list. The default is set to feature type gene.
- Filter by Annotation: Show only features that contain a given text in a specified annotation (e.g., annotation gene must start with rp).
- Filter by Names: Show only features that were found in a list of names. This list is imported from a file or from clipboard. Normally the output file of a core genome definer is used here.
The Select All button (or CTRL-A) selects all features that are shown in the resulting filtered table.
Create Task Template Targets
Press the button ![]() Create Task Template Targets to create new targets for the selected features.
Create Task Template Targets to create new targets for the selected features.
In most cases, one layer will be created per target.
If a coding region is not continuous, then 3 layers will be created: One (non-coding) default layer that covers the whole sequence, one coding layer that contains all coding areas, and one non-coding layer that contains only the non-coding areas.
The ![]() Check Targets button can be used to check that the extracted sequences are unique. This check is also automatically done when the dialog is confirmed.
Check Targets button can be used to check that the extracted sequences are unique. This check is also automatically done when the dialog is confirmed.