

Contents
1 Overview
This tutorial describes how to use the Ridom Typer software to analyze single-target Sanger sequence data (e.g., chromatogram files) using a predefined Internal Transcribed Spacer (ITS) reference library. The results are interpreted according to the CLSI MM18 guidelines. This document states that the ITS regions and the 600 nucleotide D1/D2 region of the 28S subunit, the most phylogenetically variable regions, are most widely used for fungal identification. Due to its high degree of conservation, the 28S coding region provides less diversity for fungal genus or species identification. The document also recommends that amplicons and sequences should be as long as possiblet in length. Therefore, usually both ITS regions are amplified. The 5.8S region between ITS-1 and ITS-2 is a highly conserved region; however, although it does not contribute to identification because of its conservation, it may be used for QC in a routine ITS sequencing process. Most commenly the primers ITS-1 (5'-TCCGTAGGTGAACCTGCGG) and ITS-2 (5'-TCCTCCGCTTATTGATATGC) are used for amplification and sequencing the ITS regions. However, the considerable length variability of ITS-1 and ITS-2 should be taken into account when interpreting the results.
2 Preliminaries
- This tutorial requires a running Ridom Typer client and server, version 11.1 or newer. Start the Ridom Typer server, then launch the Ridom Typer client and initialize the database. For evaluation purposes, a free evaluation license can be requested.
- This tutorial uses an ITS task template that is not available via the Task Template Sphere. Therefore, download the ITS UNITE task template manually as file. The import process is described later in this tutorial. The task template is based on the UNITE general FASTA release for Fungi (2025-02-19).
- Citation: Abarenkov K, Nilsson RH, Larsson K-H, Taylor AFS, May TW, Frøslev TG, Pawlowska J, Lindahl B, Põldmaa K, Truong C, Vu D, Hosoya T, Niskanen T, Piirmann T, Ivanov F, Zirk A, Peterson M, Cheeke TE, Ishigami Y, Jansson AT, Jeppesen TS, Kristiansson E, Mikryukov V, Miller JT, Oono R, Ossandon FJ, Paupério J, Saar I, Schigel D, Suija A, Tedersoo L, Kõljalg U. 2023. The UNITE database for molecular identification and taxonomic communication of fungi and other eukaryotes: sequences, taxa and classifications reconsidered. Nucleic Acids Research, https://doi.org/10.1093/nar/gkad1039
- Download and extract the example data archive: Ridom_Typer_Examples_Sanger_ITS.zip
3 Downloading Task Template and Creating Project
- Step 1: Create a new Project for your sample data via the menu command File | New | Create Project
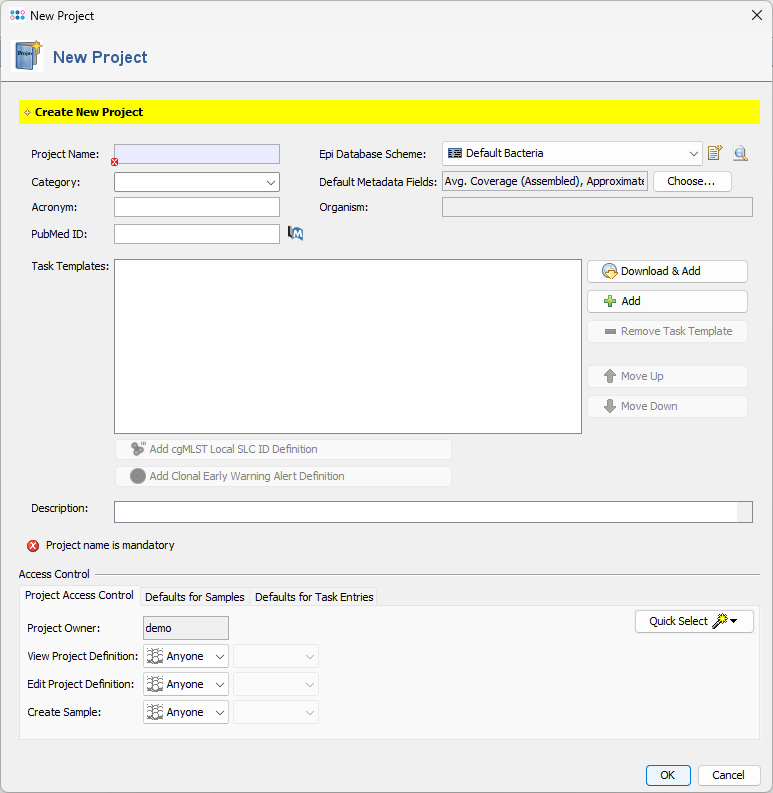
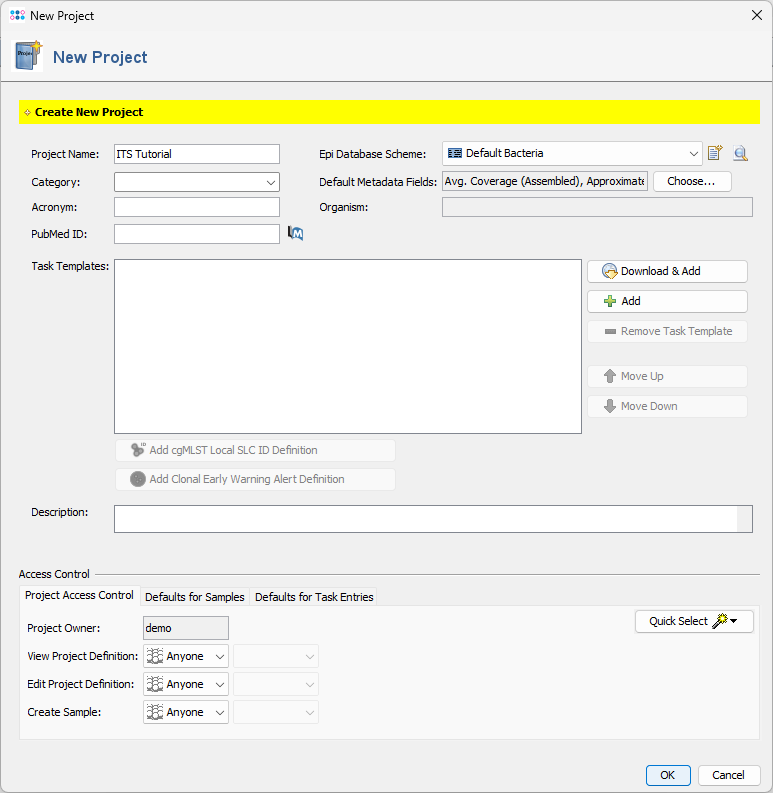
- Step 3: Enter a name in the Project Name field (e.g., ITS Tutorial). All other fields can be left at their default values.
- Step 4: Click
 Add in Task Templates section to add a task template to the project. The dialog window Add Task Template to Project opens and displays the Task Templates already available in the database. Click
  Import from File and select the downloaded file ITS_UNITE.tasktemplate
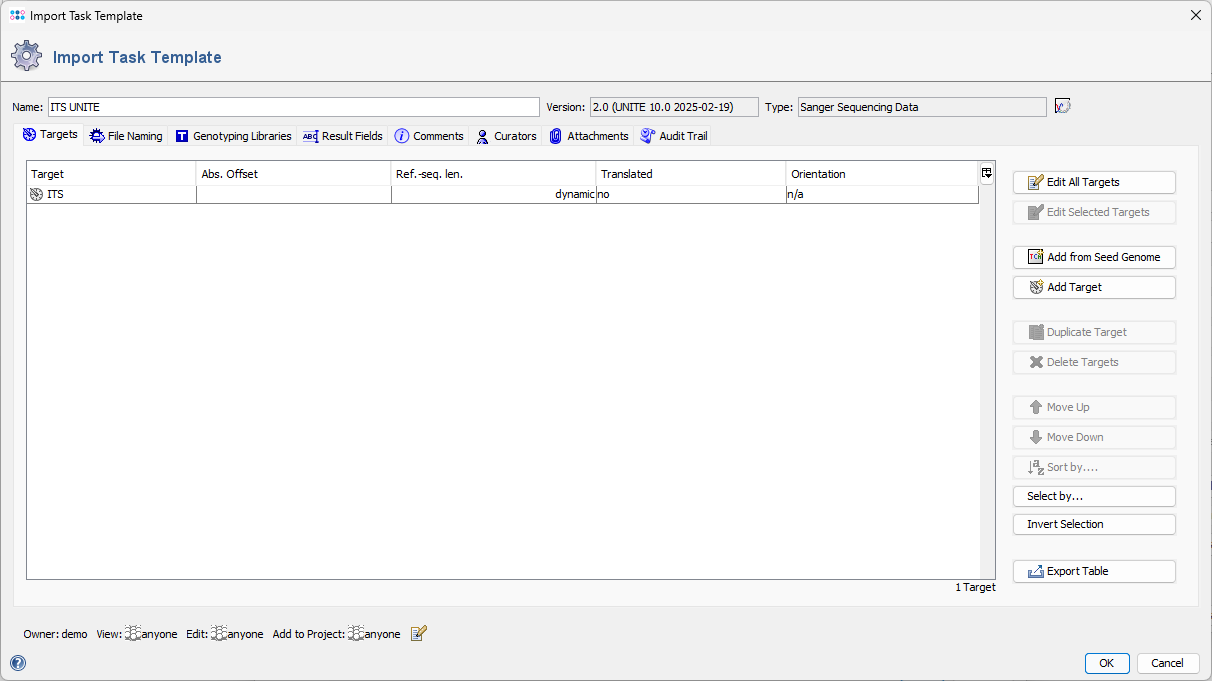
- Step 5: An editor window will open displaying containing with the ITS UNITE task template that will be imported. Further editing can be done here before importing. For the example data, no further editing is required. Click OK to confirm the dialog and import the task template.
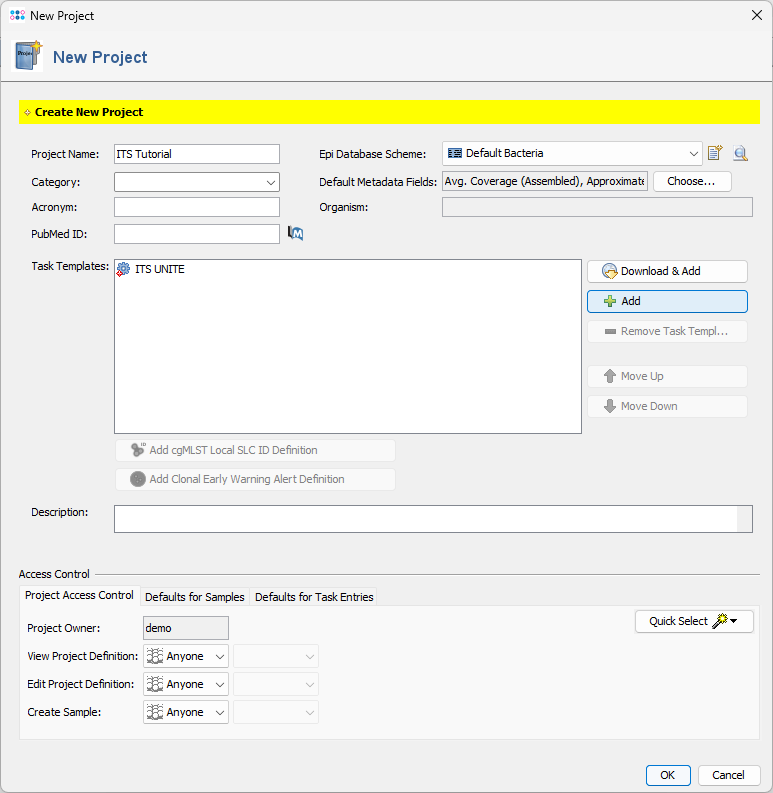
- Step 6: The newly imported task template remains selected in the dialog. Click OK to add the new task template to the project. Then save your project by confirming again with OK.
- Ridom Typer is a resequencing software. Once a project like this is setup, you can analyse hundreds or thousands of sequence data files efficiently.
4 Assembling and Analysing Sanger Sequence Data
- Step 1: From the menu, select File | Process Sanger Sequencing Data. Click the
 button above the file browser panel on the left, and navigate to the directory where you have extracted the tutorial example data.

- Step 2: The files are now shown in the file browser panel on the left. Select all six files (e.g., with CTRL-A).
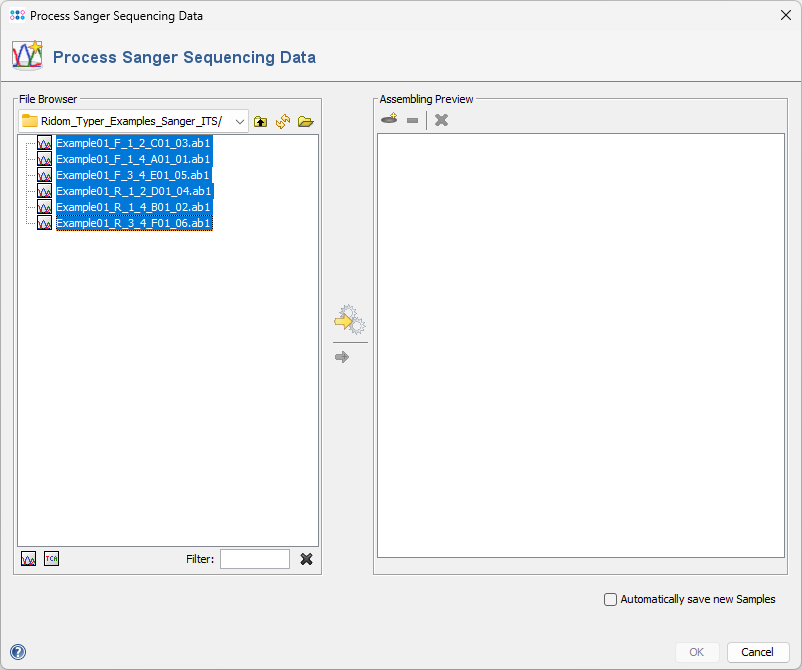
- Step 3: Click the
 button in the toolbar in the center of the dialog.
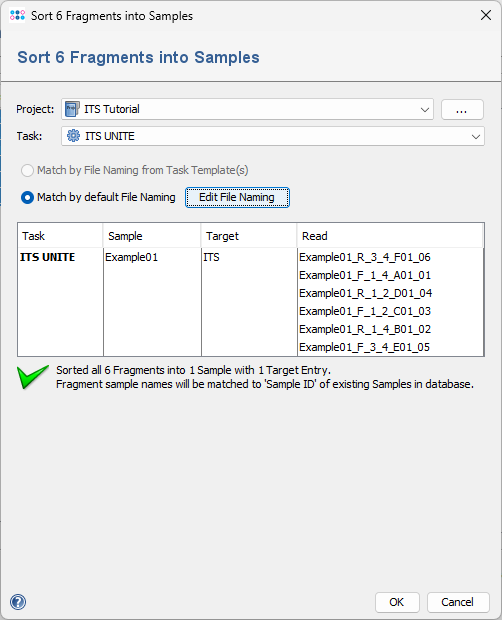
- Step 4: A dialog opens to sort the chromatograms (fragments) into Samples. Ensure the correct ITS project is selected. Select Match by default File Naming. Since file naming is recognized automatically, the six chromatograms will be sorted into one sample. If this does not work for your own data , use the Edit File Naming button to adjust settings (alternatively, file naming can be defined in the task template). Confirm the dialog by clicking OK.
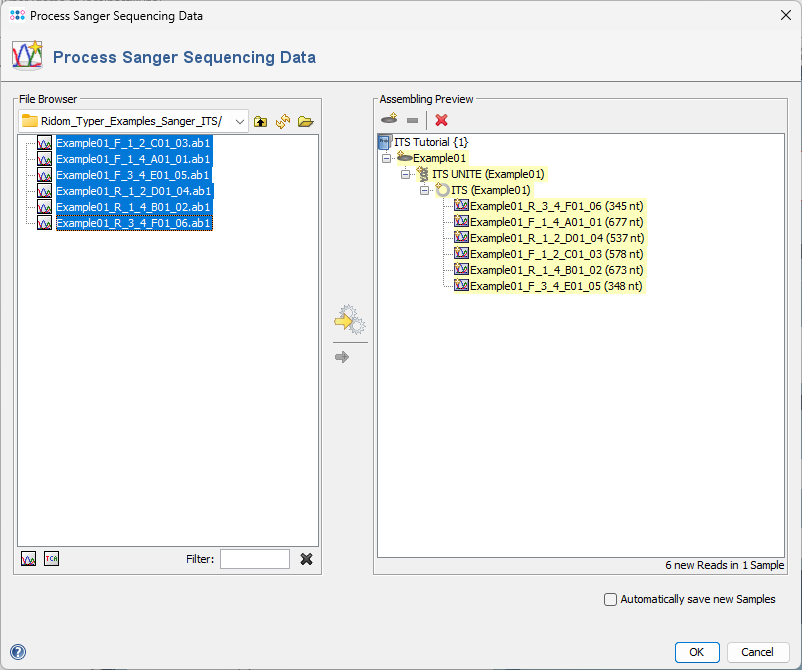
- Step 5: The preview on the right shows the six chromatograms sorted into one newly defined Sample. Confirm by pressing OK to start assembling the chromatograms and processing the Sample.
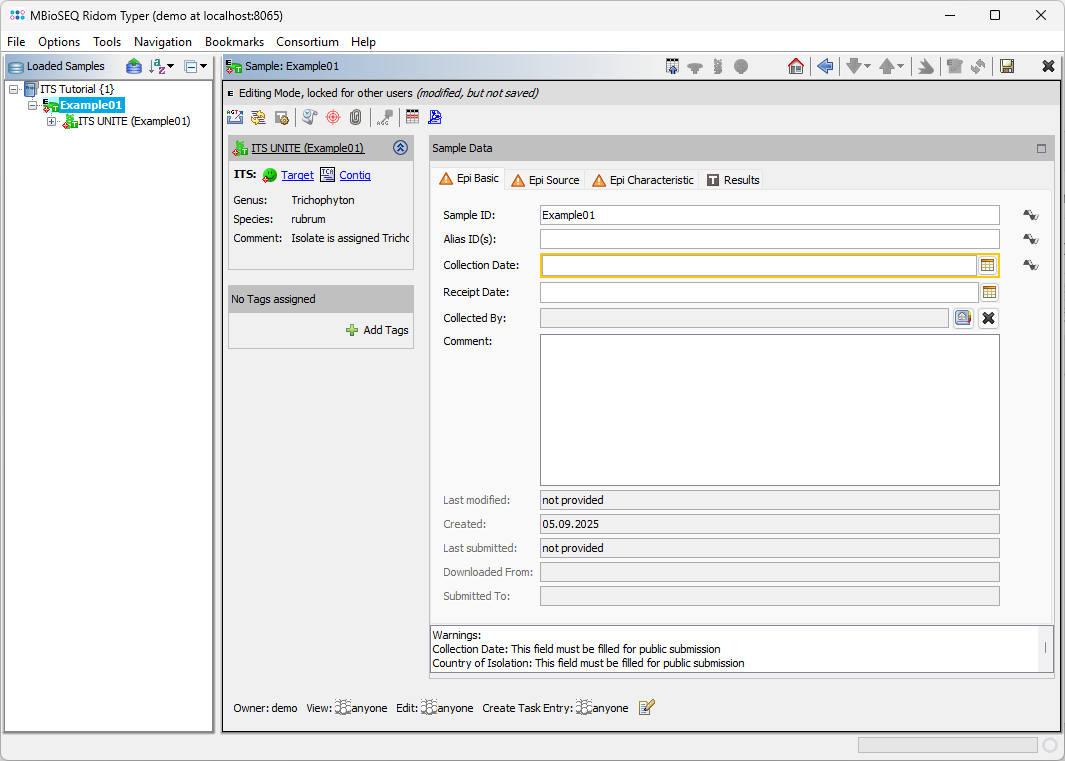
- Step 5: The six reads are now assembled into one new Sample, listed in the tree on the left. On the right, an overview and the epi metadata are shown. The overview displays one ITS target. Click the Contig link to show the assembled sequence data.
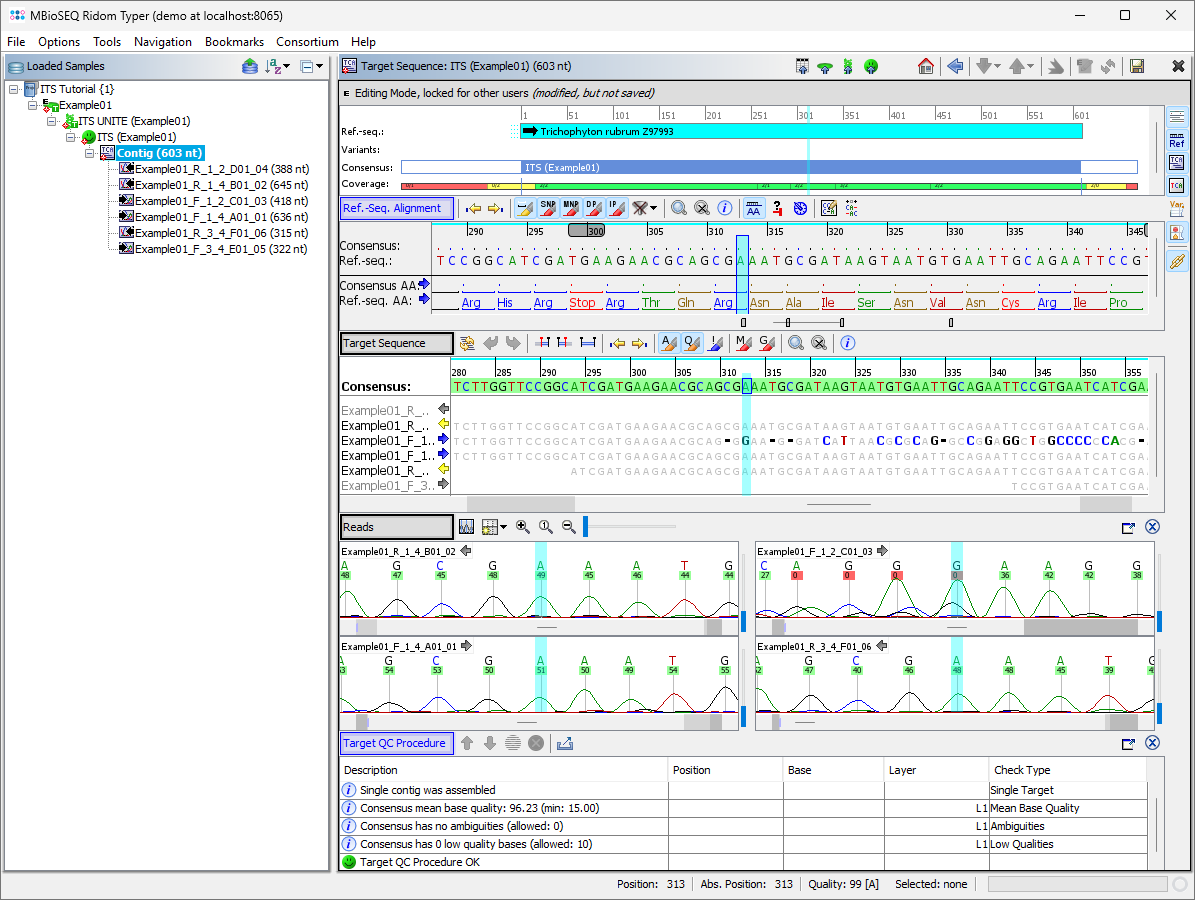
- Step 6: The assembled chromatograms and the contig alignment with the best matching reference sequence from the ITS library are shown. Clicking a position in the Target Sequence section highlights the corresponding base calls in the chromatogram. If necessary, base call errors can be edited manually by right-clicking on the chromatograms. This is not needed for the tutorial sequence data.
- For use with further web services (e.g., NCBI Blast search), the consensus can be exported to the clipboard or to a FASTA file by right-clicking on the consensus in the Target Sequence section and choosing Copy Bases of Consensus Area(s) to Clipboard or Export Bases of Consensus Area(s) to File.
- In the navigation tree on the right of the window now double-click on the subnode ITS UNITE of the sample to show the result of the ITS task.
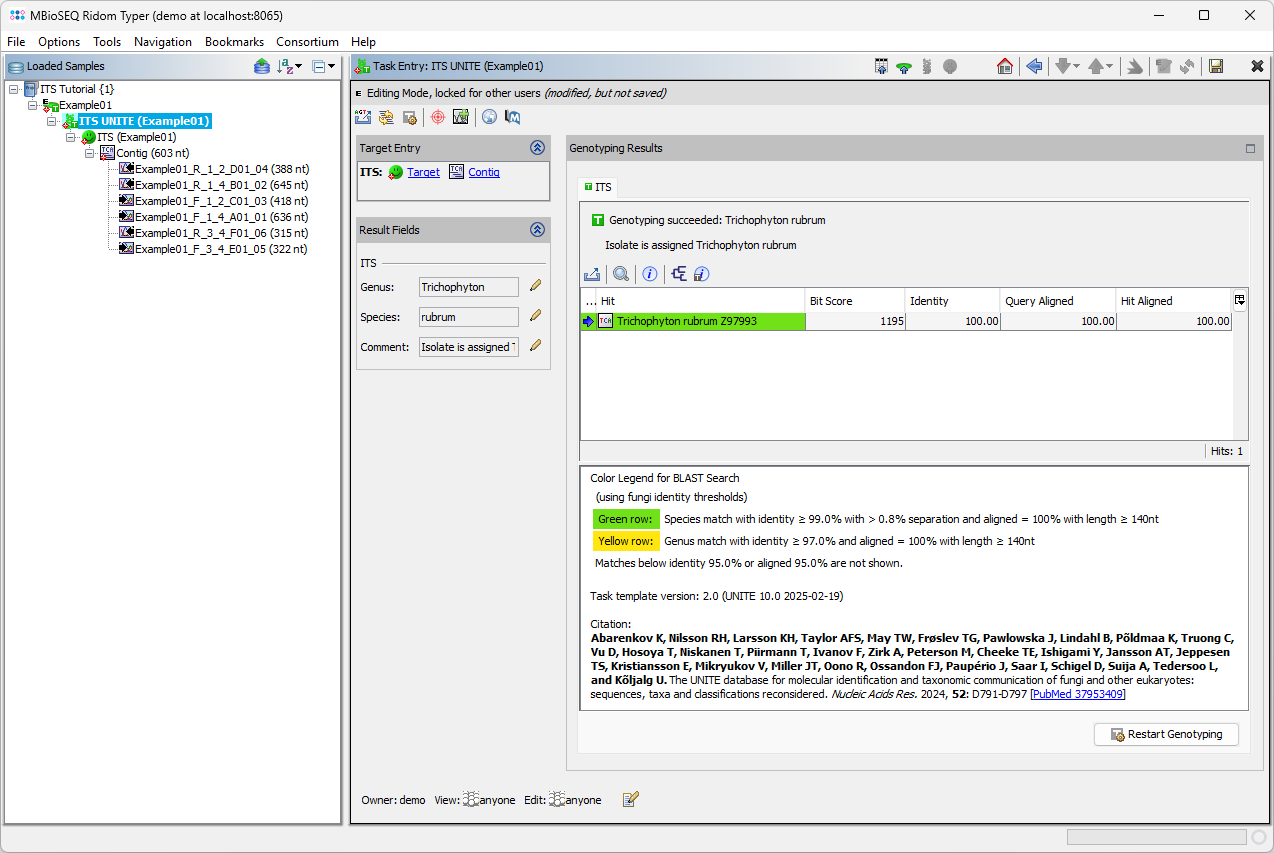
- Step 7: The BLAST search result is displayed in a table. There is one match: Trichophyton rubrum. The match is highlighted in green as it meets the required thresholds: identity above 99.0% and more than 0.8% distance to any second best match. BLAST matches below 95% identity or overlap are not shown. The Genus and Species fields are automatically filled from the top match. Additionally, a short report describing the typing result is written to the Comment field.
- The result reporting algorithm is based on CLSI MM18 Interpretive Criteria for Identification of Bacteria and Fungi by Targeted DNA Sequencing (2nd edition). The following blast match thresholds are applied: match length ≥ 150nt; species match identity ≥ 99.0%; species match separation > 0.8%; genus match identity ≥ 97.0%.
5 Storing and Retrieving Samples
- Step 1: From the menu, select
 File | Save All to store the samples to the database on your Ridom Typer server. Then select File | Close All to remove it from the workspace.
- Step 2: Choose
 File | Search Samples. Select the project in the Project box, and choose 1 day(s) for Recently modified. Then press the Search button.
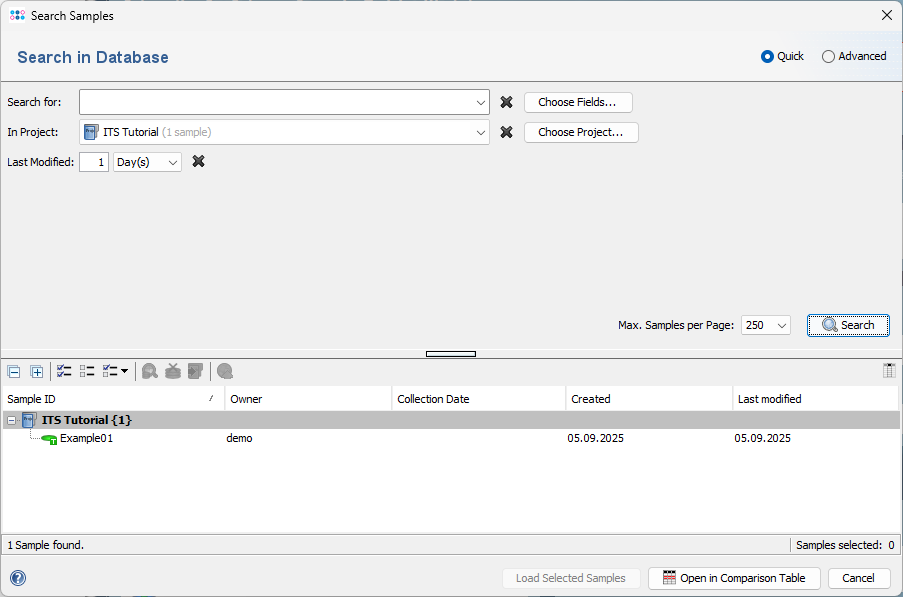
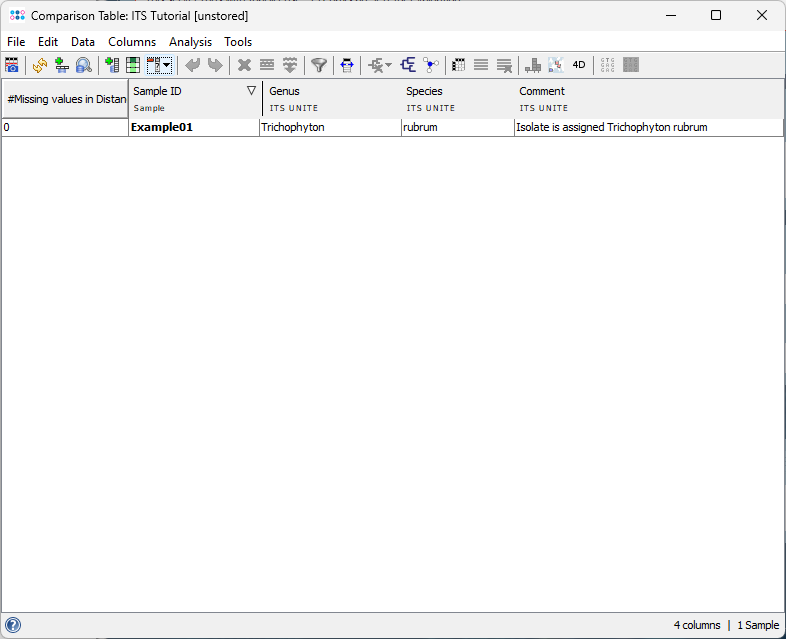
- Step 4: The sample that just has been saved is listed as search result and could be loaded to workspace again. For now close this dialog, and invoke in the menu Tools | Comparison Table.
- Step 5: The new ITS project and the ITS UNITE task are pre-selected by default. Confirm the dialog with the Create Comparison Table button.
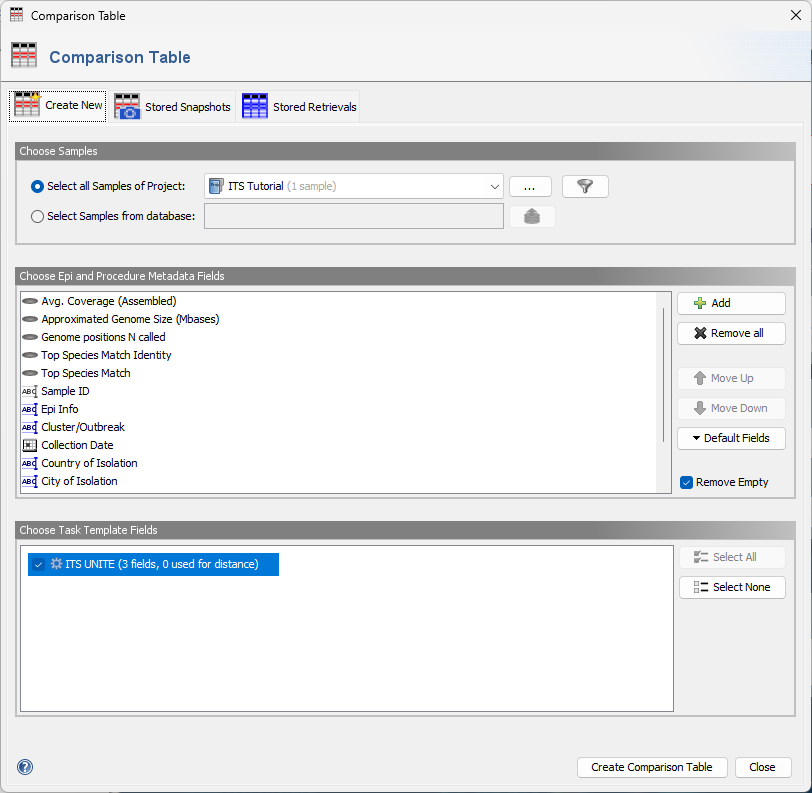
- Step 6: A comparison table is shown for the sample. The three fields Genus, Species, and Comment show the result of the ITS UNITE task.
FOR RESEARCH USE ONLY. NOT FOR USE IN CLINICAL DIAGNOSTIC PROCEDURES.