

Contents
Importing from File into one Project
Ridom Typer can import epi metadata from MS Excel and CSV files. The Excel file must contain a simple data table, where each row holds the values for one Sample. One column of the table must contain the Sample ID. This Sample ID is used to match table rows to Samples. The Sample ID must be unique for each Sample in a Project.
- Step 1: Use the menu item
 File | Import Epi Metadata and select in the upcoming file chooser dialog the MS Excel or CSV file for import.
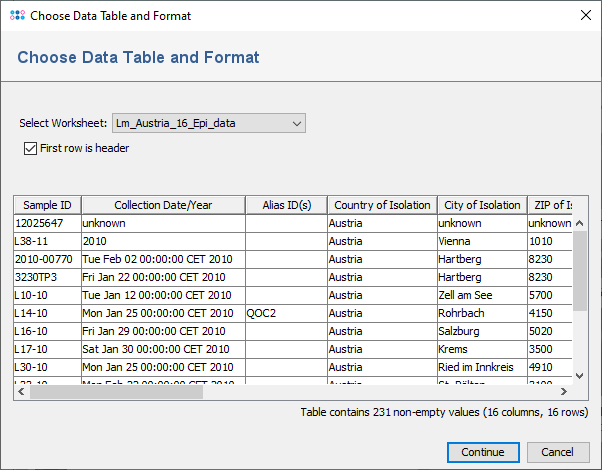
- Step 2: A preview of the file content is shown. If the first row of the contains the header, the box First row is header must be selected. Press Continue.
- Step 3: In the upcoming dialog the project must be chosen in which the data should be imported. Below of this field, the following options are available
- Save definition: If selected and a name is entered, the import definition (i.e., the mapping between columns and database fields) is stored in the database for later usage.
- Import only new Samples: If selected, data will only be imported for Sample IDs that are 'not exist in the database.
- Import only into existing Samples: If selected, data will only be imported for Sample IDs that are 'exist in the database.
- Overwrite existing data: If selected, fields that contain already data will be overwritten with the content of the imported file.
- Skip empty cells: Is selected by default. If selected, empty table cells are ignored when importing data. If unselected, empty cells will delete existing values in the database, if Overwrite existing data is also selected.
- Allow import into Task Entry fields: If selected, the genotyping result fields provided by task templates of the selected project can also be mapped for import.
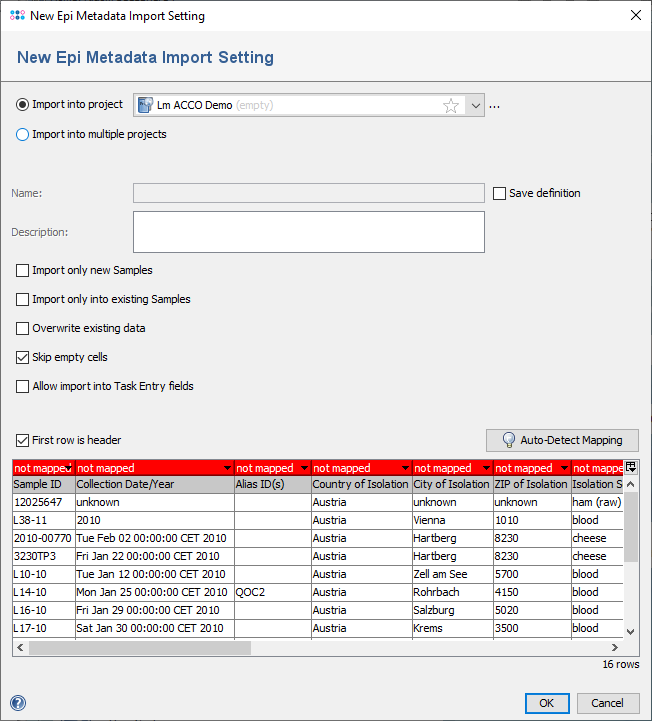
- Step 4: Now the columns of the file must be matched to the fields in the database. If the column headers have similar names, this can be easily done with the button Auto-Detect Mapping. If this fails, because some columns have different names than the fields, the mapping must be defined manually by clicking on the column headers. The Sample ID column must always be mapped, because it is used to match the rows to Samples. All other fields are optional. Columns that are not matched to a field yet are highlighted red and will not be used for the import. The popup menu that appears when the table header is clicked contains all fields that are used in the currently selected Project. If the mapping is set, press OK to start the import.
Importing from File into multiple Projects
If the table that should be imported contains also the projects, then the data can be imported into different projects at once. To perform this, select in the import dialog the option Import into multiple projects. The table must then contain a columns with header "Project", where the values are unique project names or project acronyms of projects existing in the database.
Managing and Reusing Epi Metadata Import Setting
The mapping from table columns to Sample fields can be stored in the Epi Metadata Import Settings. The mapping is stored by the position in the table. If import settings were already stored, the menu function![]() File | Import Epi Metadata starts with a different dialog
File | Import Epi Metadata starts with a different dialog
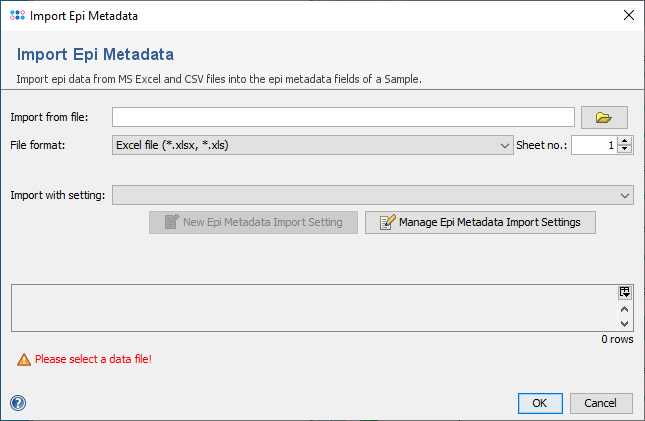
- Select the MS Excel or CSV file for import. For MS Excel files the used sheet can be specified. For a CSV-file, the field delimiter can be provided.
- An existing Epi Metadata Import Setting can be selected in the Import with setting box. Epi Metadata Import Settings with a different column count than the selected file cannot be used and are highlighted in red.
- To define a new Epi Metadata Import Setting, click the
 New Epi Metadata Import Setting button.
- To edit or delete existing Field Import Settings, use the
 Manage Epi Metadata Import Settings button.
Importing Dates
When importing dates from CSV files, make sure the date is in format yyyy-MM-dd or dd.MM.yyyy.
Importing Antimicrobial Interpretations
When importing into antimicrobial interpretation fields, the following values can be used (upper- or lowercase).
- For Resistant:
- 'resistant', 'R', '+', or '1'
- For Intermediate:
- 'intermediate' or 'I'
- For Susceptible:
- 'susceptible', 'S', '-', or '0'
Multiple Mapping of Fields
The following fields can be mapped to multiple columns:
- Comment
- Alias ID(s)
- EBI/NCBI Accession(s)
The values of those columns are concatenated (with delimiter "," or line break) to a single value that is imported into the database field.
FOR RESEARCH USE ONLY. NOT FOR USE IN CLINICAL DIAGNOSTIC PROCEDURES.