
| wiki | search |
The workflow of a pipeline is defined by a pipeline script. Pipeline scripts are always stored locally on your computer. A pipeline script can be easily created using the wizard dialog which has the following six chapters.
Contents |
Server Account
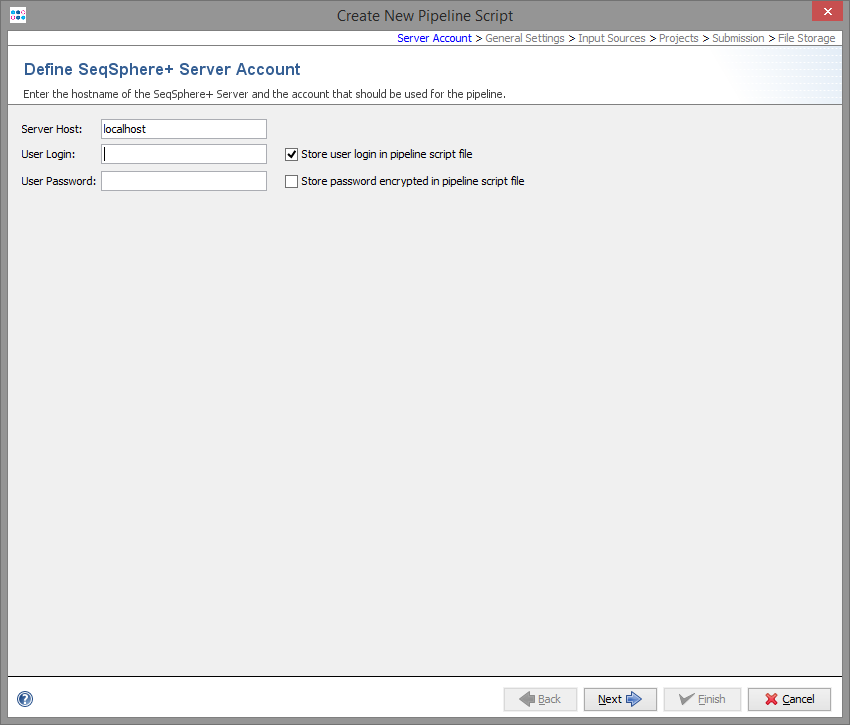
In the first step the SeqSphere+ server must be defined where the pipeline should run.
To define the settings of the pipeline a user account on this server is required. By default, the user account will be stored in the pipeline script, and the pipeline will run with this user account. This means that the defined user will be the owner of the Samples that were created by the pipeline run.
If the user is not stored in the script, a login dialog is shown when starting the pipeline and the pipeline runs with this login information.
The password of the user can also be stored in the pipeline script. The password is stored encrypted.
Warning: If user and password is stored in the pipeline script, then anyone who has access to the computer account can perform the pipeline without further authentication!
General Settings
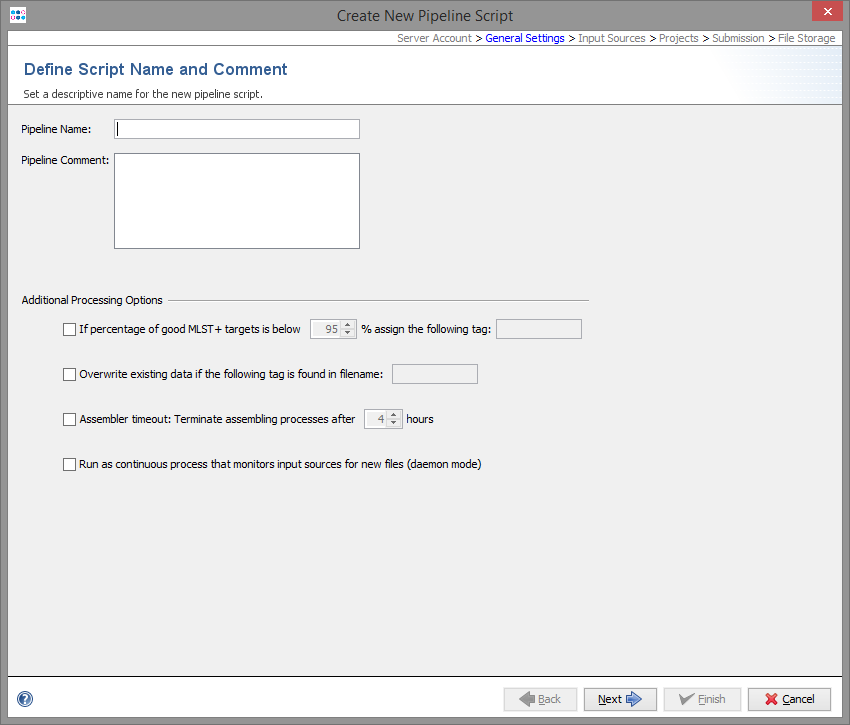
The second step defines general settings for the pipeline. Each pipeline must have a unique name and optionally a comment can be defined.
Several processing settings can be activated:
- Define a Sample tag for bad typing result:
- This can be used to define a tag that is automatically assigned to a Sample, if the percentage of good MLST+ targets is below the given value. If no MLST+ Task Template is used, this parameter has no effect.
- Define a filename tag for overwrite existing:
- In some cases it can be useful to overwrite existing data in existing Samples with the imported data from the pipeline run (e.g., repeating of bad sequencer runs). This can be achieved if the filename of the new input data contains a specific part that is defined here as overwrite tag'. If the tag is found in the tag-part filename, according to the file naming defined in the Input Sources step, the sequence data of an existing Sample in the database will be overwritten
- Define a timeout for assembling/mapping:
- This can be used to terminate an assembling/mapping processes if it takes long.
- Run the pipeline periodically waiting for new files
- This can be used to define a pipeline that waits for new files in a specific directory. When started, the pipeline processes all existing files found in the input sources. After the files are processed, the pipeline waits until new files appear in the input sources, and then starts again.
Input Sources
File Location
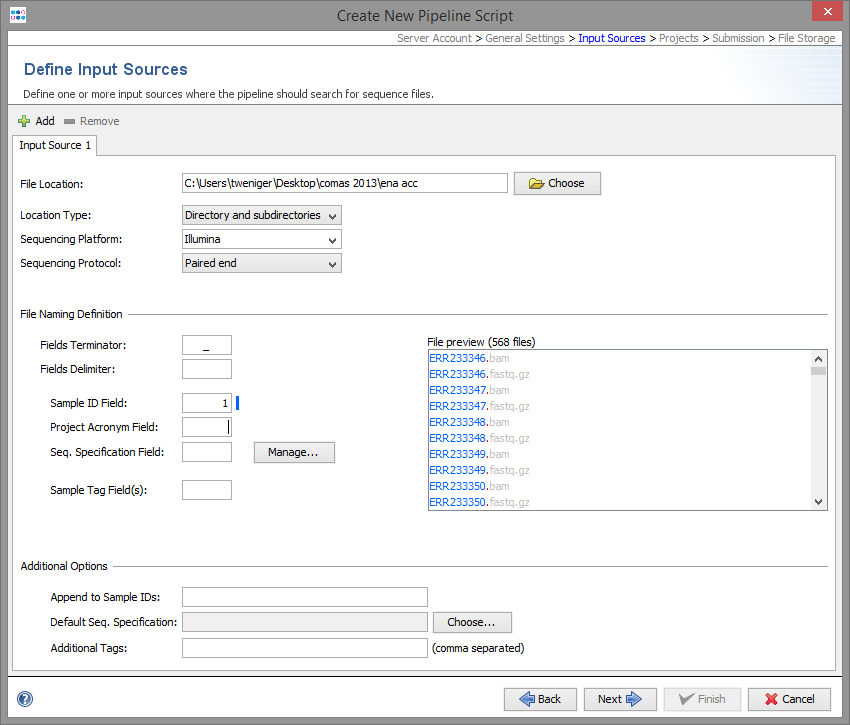
An input source define where the pipeline should look for new files. Multiple input sources can be defined per pipeline script.
The file location of an input source can be
- a directory, or
- a directory including all subdirectories, or
- a network device linked to a Illumina MiSeq repository
The Sequencing Platform and the Sequencing Protocol (e.g. paired end) must be defined for each input source.
File Naming
Each input source must also have file naming definition, that describes at least how to get the Sample ID from the file name of the sequence data.
First, the file name is split into different fields by a delimiter until the defined terminator appears. If no terminator is defined, the whole file name (without file extension) is used.
Secondly, the usage of the different fields can be defined, by entering the field number (beginning with 1) into
- Sample ID Field:
- Defines the Sample ID.
- Project Acronym Field:
- Defines the Project (can be left empty if only one Project is defined).
- Seq. Specification Field:
- Defines the name of the Sequence Specification (can be left empty).
- Sample Tag Field(s):
- Defines on or more tags that should be added to the Sample (can be left empty). Multiple fields can be separated with comma.
Additional Options
- Append postfix to Sample IDs
- In some case it can be useful to append some static text to the IDs of all Samples that are imported from this input source (e.g., "_pipelinetest").
- Default Seq. Specification
- If the sequence specification is not defined by the file naming, a default value can be chosen here, that will be used for all Samples that are imported from this input source.
- Additional Tags
- In some case it can be useful to add a tag all Samples that are imported from this input source. Multiple tags can be entered by comma separation.
Projects

The project step describes where processed Sample data will be imported. If more than one Project is defined here, each Project must have an acronym. The Project for each Sample is selected by the acronym that is found in the file name of the input data.
Each Project must have a reference genome. The reference genome is automatically taken from the first Task Template in this Project that has a reference genome. The reference genome can also be set manually.
By default all Task Templates of a Project are used for the pipeline. This can be limited to selected Task Templates.
In this step the assembling/mapping is defined. For each platform (defined by the input sources step) an assembler or mapper can be selected. Currently two programs are available:
Submission
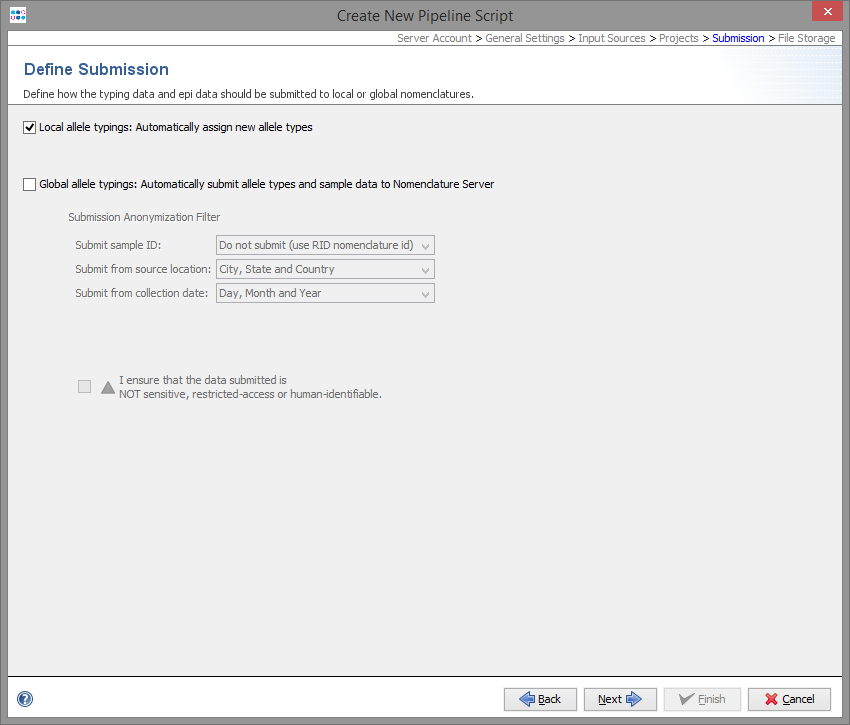
For local allele libraries the default setting is to automatically assign new types (if possible).
For global allele libraries, like MLST+ Nomenclature Server, an automatic submission can be defined here. The privacy settings can be defined for the pipeline.
Important: Submission to the Nomenclature Server is only possible if all mandatory fields are filled. Therefore, submission by pipeline does only work if the Samples entries are already existing in the database and all mandatory fields for submission (collection date and country) are filled.
File Storage
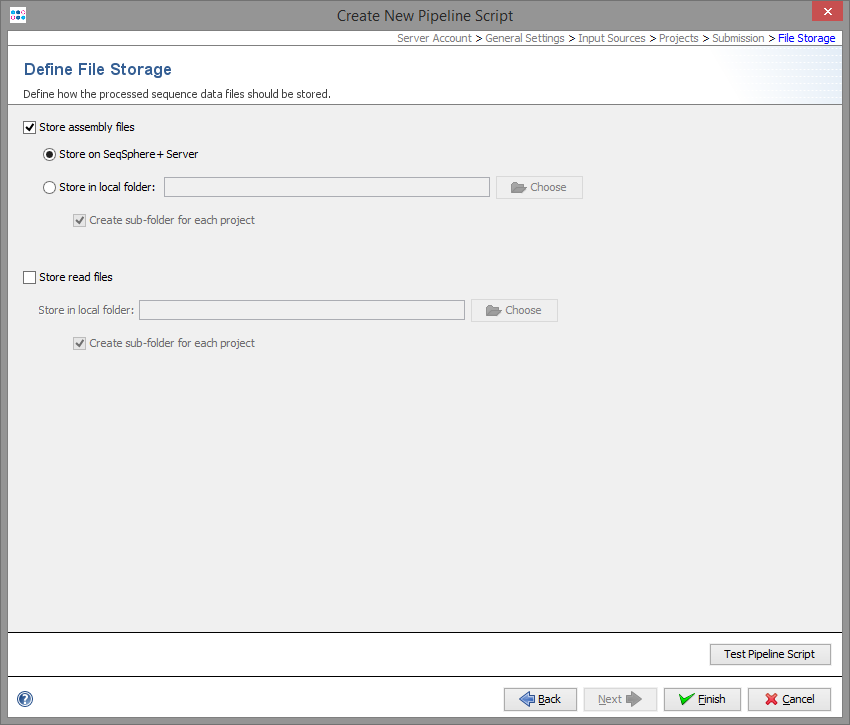
In the last step it can define what the pipeline process should do with the processed input data.
The assembly files (previously assembled or assembled/mapped by the pipeline) there can uploaded and stored to the SeqSphere+ server, or they can be copied to an output folder available on the client computer. If wanted, subdirectories can be created with project acronym (if available) or name.
The raw read files can also be copied to an output directory.
In any case, an attachment is added to the processed Sample. This attachment can be used to retrieve the assembly files from the server or from the local directory and add new data from this file into the Sample data set.
If the assembly file was uploaded to the server, it is automatically deleted when the attachment is removed from the Sample, or if the whole Sample is deleted.