
| wiki | search |
Contents |
1 Overview
This tutorial describes how to use Ridom SeqSphere+ software to define a stable MLST+ schema that can be use for an expandable nomenclature. Creating a stable expandable MLST+ schema is a 3 step process:
- Defining the MLST+ Schema
- Evaluating the MLST+ Schema
- Calibrating the Cluster Type Threshold
Neisseria meningitidis is used exemplarily for this demonstration. However, by reading this tutorial you should be able to define your own projects for other species.
Furthermore this step by step tutorial describes how figure 1(B) of the Life Technologies application note Bacterial Typing using the Ion PGM™ System and Ridom SeqSphere+ software is reproduced.
2 Preliminaries
- Installation: This tutorial requires a running SeqSphere+ client and server. If not done yet: Download and install the SeqSphere+ 64bit client and server software on your computer. Start the SeqSphere+ server, then start the SeqSphere+ client and initialize the database. For evaluation purpose a free evaluation license can be requested.
- Tutorial Data: Download the example data archive SeqSphere_Examples_Schema_N_meningitidis.zip for this tutorial, and extract the zip-file on your computer. The example data contains Neisseria meningitidis PGM 200bp whole genome shotgun (WGS) data of 3 samples of a community outbreak that was published by U. Vogel et al. (JCM 50: 1889, 2012).
3 Defining the MLST+ Schema
3.1 Choosing the Reference Genome
- Each MLST+ schema is based on a reference genome. The Reference isolate/genome must fulfill the following criteria (in decreasing priority):
- The reference genome must be finished, annotated, and accessible (e.g., from NCBI). The genome should have been best done with Sanger sequencing (avoid ‘pyro’ sequenced genomes).
- The reference isolate should be available from culture collections (e.g., ATCC and/or DSMZ; sometimes difficult to fulfill for ‘biological warfare’ isolates) and DNA for sequencing must be available.
- Preferentially the reference isolate should be the type strain or another well characterized strain of the species.
- For N. meningitidis the FAM18 strain is used as reference genome, available from NCBI GenBank with accession number NC_008767
- Step 1: Choose from the menu Tools | MLST+ Target Definer to open the target definer dialog.
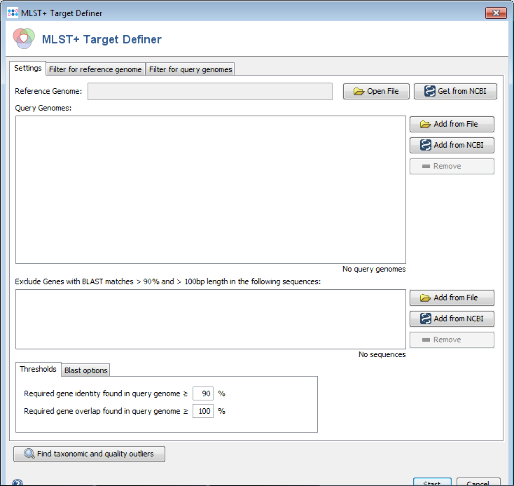
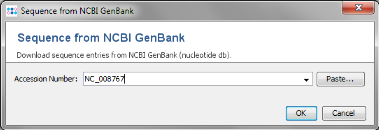
- Step 2: Press
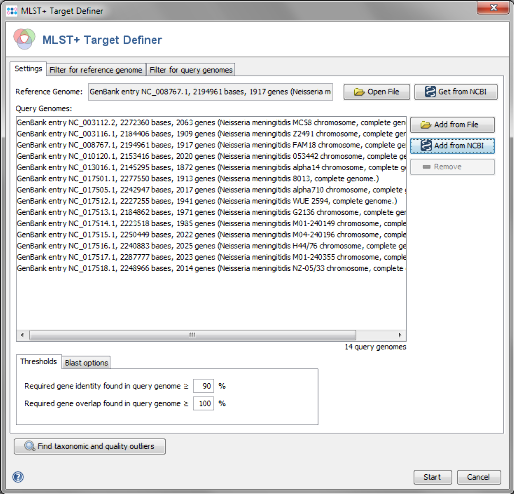
 Get from NCBI in the Reference Genome field on the top and enter the NCBI accession number of the chosen reference strain. For this tutorial this is NC_008767. Press OK to retrieve the sequence and insert it as reference genome.
3.2 Adding Query Genomes from NCBI GenBank RefSeq
- Query genomes are used to reduce the number of genes for the reference genome to a stable amount that appears in most strains of the species. We recommend to start with all available finished NCBI GenBank RefSeq genomes as query genomes.
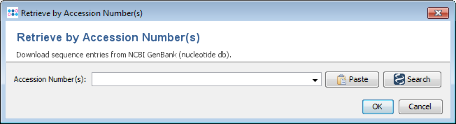
- Step 1: Press Add from NCBI GenBank in the Query genomes section target definer dialog.
- Step 2: Press Search button. A list of all finished genomes that are available on the NCBI GenBank ftp site is shown.
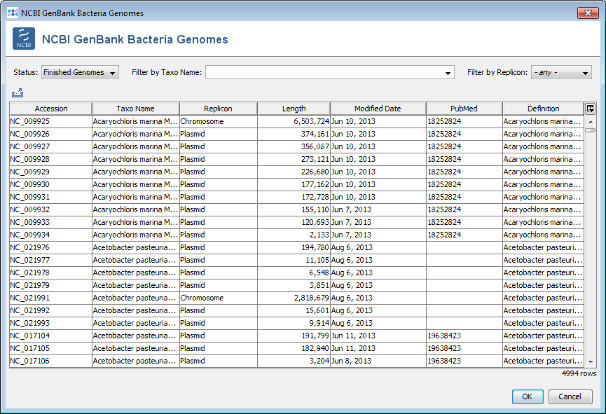
- Step 3: Choose or enter Neisseria meningitidis in the Taxo Name field and select Chromosome in the Replicon field to filter the list. Select all found N.meningitidis chromosomes except for the reference genome NC_008767- Press two times OK to download the entries.
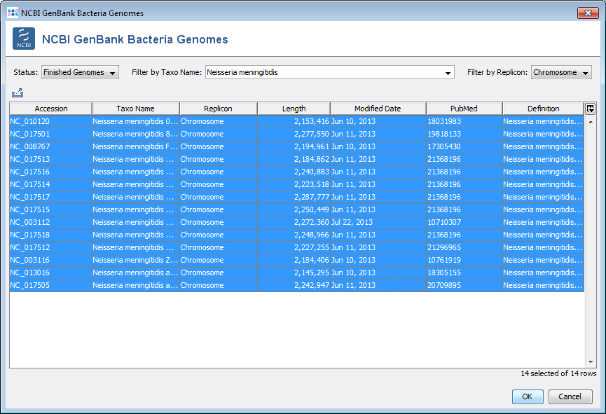
- Important note: As of November 2013 14 finished genomes can be found at NCBI GenBank. If your current search result returns a different number of genomes, please use the file N_meningitidis_NCBI_genomes.txt from the example data folder instead of your own search result to continue with this tutorial.
- Step 4: The NCBI GenBank genomes are downloaded and added to the list of Query Genomes. (Do not yet press the OK button!)
3.3 Adding Query Genomes from other sources
- If not enough finished genomes are found with the GenBank RefSeq search, other sources can be used to search for suitable query genomes:
- Search at NCBI GenBank Genome database for draft genomes of the organism (example).
Hint: Click on See more in Section Genome Sequencing Projects. Then click on the BioSample link of the draft genome that you want to use to get the WGS (or GenBank WGS master accession) number. This number can be added to the list of query genomes in SeqSphere+ with the normal Add from NCBI button.
- Search at NCBI GenBank Genome database for draft genomes of the organism (example).
- Use your own sequence data as query genome. The sequence data must be de novo assembled or reference mapped. Supported files formats are (multiple sequence) FASTA and GenBank.
3.4 Removing Outlier Genomes
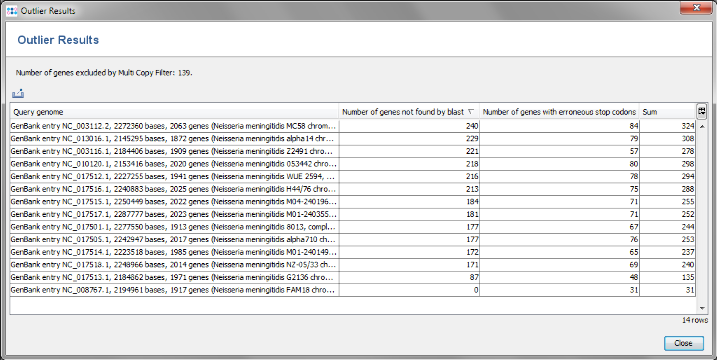
- Step 1: Press the button Find taxonomic and quality outliers. Now all query genomes are compared to each other.
- Step 2: The result show the in all query genomes between 88% to 95% of the 1917 genes were found. No obvious outlier can be identified. So all 13 genomes taken from NCBI GenBank can be used as query genomes.
- As an aside: A good example for an outlier can be found with Pseudomonas aeruginosa. Strain PA7 (NC_009656) is described as taxonomic outlier in PLoS ONE 5 (1), E8842 (2010). This can be easily verified with the SeqSphere+ function for finding outliers:
- Open from the menu Tools | MLST+ Target Definer, and use NC_002516 as Reference Genome. Then press Add from NCBI in the Query Genomes section. Use the buttons Paste... and Paste from File to import the list of accession numbers from file P_aeruginosa_NCBI_query_genomes.txt of the example data folder. After the data is retrieved from NCBI, press the button Find taxonomic and quality outliers. The results show that in PA7 genome only 76% of the 5572 genes of the reference genome were found, while in the 7 other genomes 95% to 97% of the genes were found.
3.5 Removing Plasmid Genes
- The third section in the target definer can be used to add sequence data that is used to exclude genes specific genes. This can be used to add plasmids to prevent that genes that can appear in plasmids are used for the stable MLST+ typing schema.
- Step 1: Press Add from NCBI GenBank in the Exclude Genes section of the target definer dialog.
- Step 2: Press Search button. Again the list of finished genomes is shown.
- Step 3: Choose or enter again Neisseria meningitidis in the Taxo Name field, but this time and select Plasmid in the Replicon field. If plasmids are found here press two times OK to add them to the exclude list of the target definer.
- For N.meningitidis not plasmids are published in NCBI GenBank therefore this step can be skipped here.
3.6 Calculating the MLST+ Schema
- Step 1: The MLST+ target definer dialog should now contain FAM18 as reference genome and the 13 query genomes. The shown settings for the thresholds, blast options, and for the filters should be left to default (unless there are carefully considered reasons to change them). Press Start to start the process.
- Step 2: After a few minutes the process is finished and the results are shown. Each of the 1917 genes of NC_008767 was added to one category: MLST+, Accessory or Discarded.
- MLST+ contains 1241 genes that are not homologous, do not have invalid start/stop codons in the reference genome, do not overlap with other genes, do appear uniquely in all query genomes with the defined thresholds, and do not have invalid stop codons in more than 80% of the query genomes. Those genes are used as targets for MLST+.
- Accessory contains 505 genes that are not homologous and do not have invalid start/stop codons in the reference genome, but overlap with other genes, do not appear in all query genomes or have invalid stop codons in 80% or more of the query genomes. By convention, those genes are not used for MLST+. However, they can be used in addition to increase the discriminatory power if the resolution of MLST+ is not high enough.
- Discarded contains 171 genes that are homologous or have invalid start/stop codons in the reference genome. Those genes are not used at all.
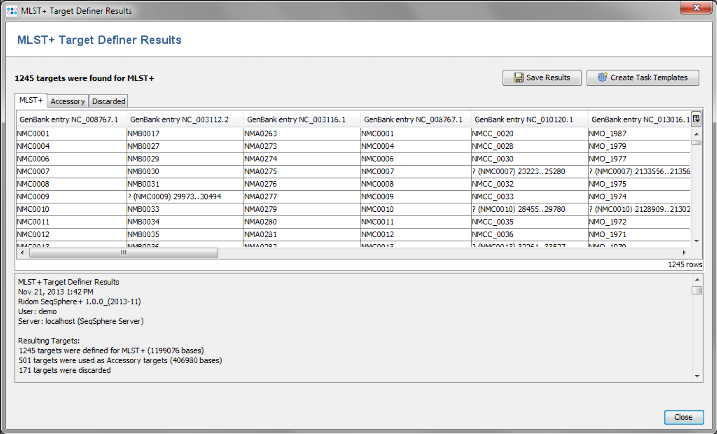
- Step 3: Press the button Create Task Templates to create two Task Templates for the target definer results that can be used for analyzing N. meningitidis next-gen sequencing data: The MLST+ Task Template is created for the 1241 MLST+ targets. A second Task Template called Accessory is created for the 505 genes of the Accessory category.

- Step 4: Press the Save to store the Task Templates.
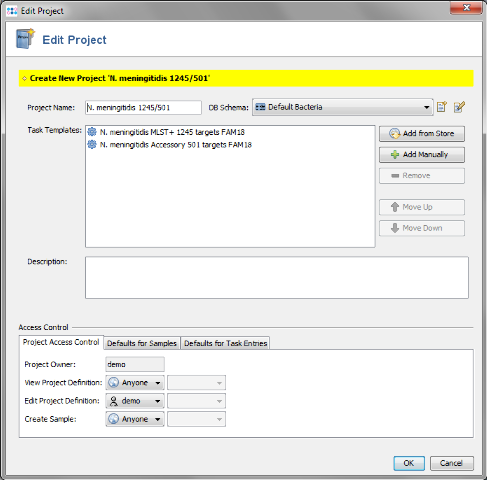
- Step 5: Press the Yes to create a new Project for the Task Templates. The name of the project can be changed.
4 Evaluating the MLST+ Schema
4.1 Evaluating with Reference Draft Genome
- As a pragmatic test for the new MLST+ schema, a draft genome of the reference strain can by analyzed. This should be sequenced with an up-to-date NGS platform (Ion Torrent or Illumina). The read data should be de novo assembled (e.g., MIRA or Newbler), or for monomorphic bacteria reference mapped (e.g., BWA or TMAP).
- For the pragmatic test of the MLST+ schema 98.5% or more of the MLST+ targets should be found and pass all automatic analysis checks. Else we strongly recommend to investigate by running duplicates or consult literature for targets known to be technical difficult to assemble (e.g., for MtbC PPE & PE gene family especially the PE-PGRS variant of the PE family; add if MLST+ targets are removed them manually to accessory targets). If problems are repeatedly observed for certain targets then remove them manually from the MLST+ targets and add them to Accessory targets.
- This evaluation step is not done in this tutorial.
4.2 Evaluating with Diverse Isolate Collection
- For the evaluation of the MLST+ schema a well-characterized diverse isolate collection spanning the whole population genetic background of the species should be analyzed. If it turns out that the schema is not yet stable (all isolates must have 95% or more good targets) then acquire additional representative isolates, produce high-quality draft genomes (with coverage ≥70 for MiSeq and ≥50 for PGM), and add them as query genomes (iterative process).
- For the N. meningitidis MLST+ schema all high quality genomes of strains originally published by Maiden et al. (PNAS 95: 3140, 1998) for establishment of MLST were used. The genome data can be downloaded from the PubMLST.
- This evaluation step is not done in this tutorial.
5 Calibrating the Cluster Type Threshold
- The calibration of the Cluster Type threshold is done by retrospective analysis of well defined outbreaks and out-group isolates with same MLST/MLVA/PFGE types.
- For the N. meningitidis MLST+ schema among others two published outbreaks were used for calibration (JCM 50: 1889, 2012 and JCM 50: 3046, 2012). The MLST+ Cluster Type distance for N. meningitidis was set to 60 alleles.
- Finalized MLST+ schemas can be published on the nomenclature server. They can be downloaded as predefined Task Template by any SeqSphere+ user. Any user of this Task Template can submit new allele types to the nomenclature & isolate repository server if at least 90% of all core genomes genes were found and basic information about the isolate (e.g., year and country of isolation) is available.
- This Cluster Type calibration step is not done in this tutorial.
6 Analyzing Outbreak Data with the MLST+ Schema
- Finally the Task Templates that were created for the new MLST+ schema can be used for a local MLST+ analysis of outbreak strains.
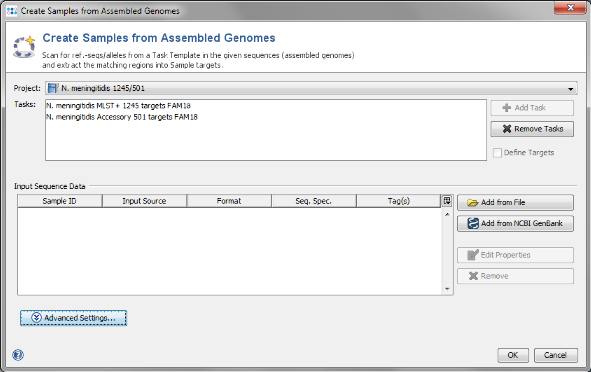
- Step 1: Choose from the menu File | Create Samples from Assembled Genomes
- Step 2: The new MLST+ Project you just created and the two Task Templates should be preselected already.
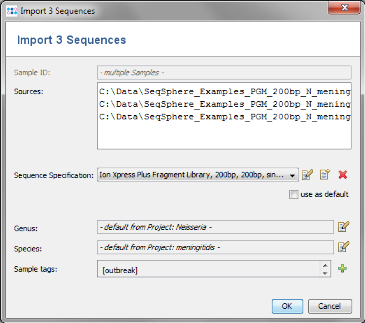
- Step 3: Now use the button
 Add from File and choose the three .ace.gz-files from the tutorial data folder. Those files are de-novo assemblies (assembled with MIRA) of NGS data. The upcoming window allows to specify sequencing information. Skip this step here by clicking OK.
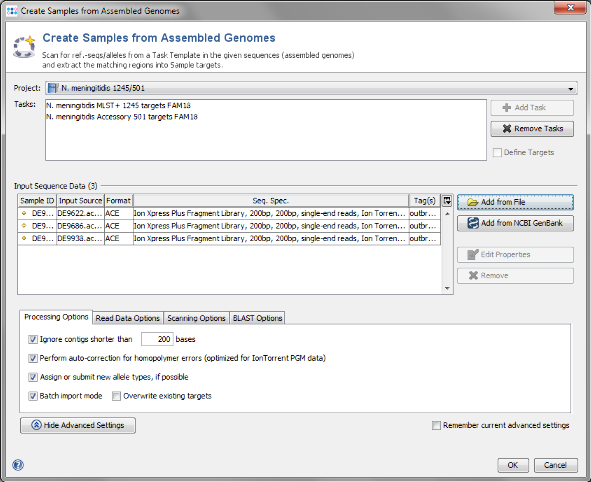
- Step 4: This time we want to run the import without further interaction. Press the button Advanced Settings and mark the option Batch import mode. Then confirm with OK to start the import process.
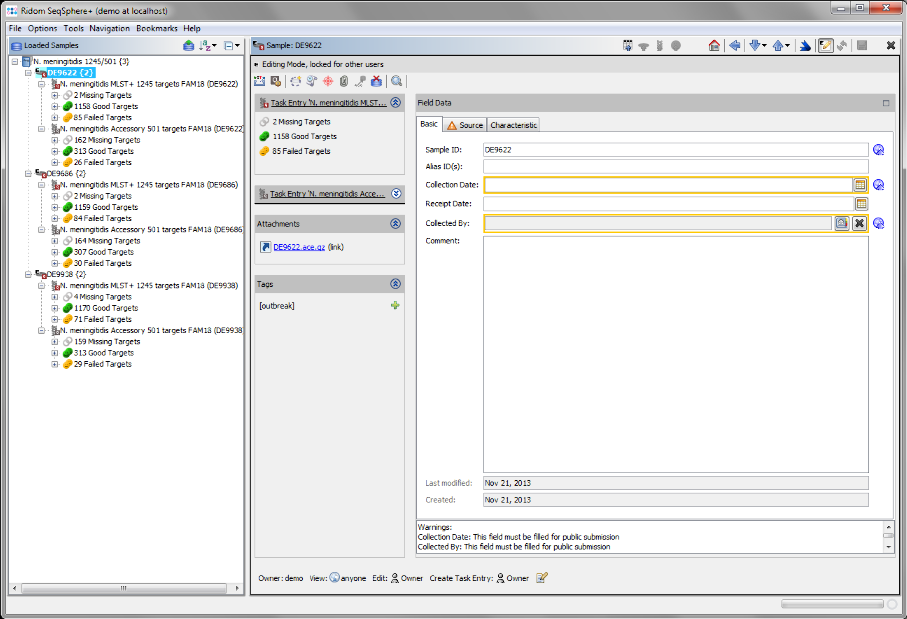
- Step 5: After the import is completed, the navigation tree shows all new Samples. Each Sample node in the navigation has two sub nodes: MLST+ and Accessory. Below the task nodes there are the target nodes. Each target node represents one sequence (here a gene) extracted from the input data (genomes or wgs contigs). The targets can have different states:
-
 Missing Targets (gray) were not extracted (because the match did not reached the thresholds in the previous step)
-
 Good Targets (green) were extracted and fulfill all requirements that are defined in the Task Template Analysis Parameters.
-
 Failed Targets (yellow) were extracted, but fail at least in one of the requirements that are defined in those parameters. For example, they may have frame shifts and incorrect lengths compared to the published FAM18 strain sequence.
-
- Step 6: Choose from the menu
 Tools | Comparison Table
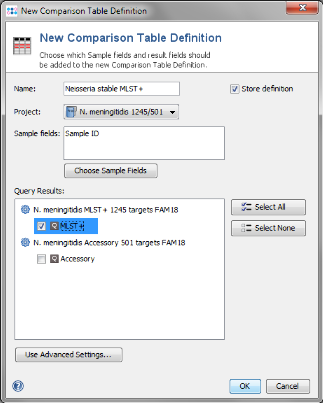
- Step 7: Press New Definition.
- Step 8: Enter a name for the Comparison Table (e.g., Neisseria MLST+), choose the new MLST+ project and select the MLST+ node in the query result section. Confirm with OK.
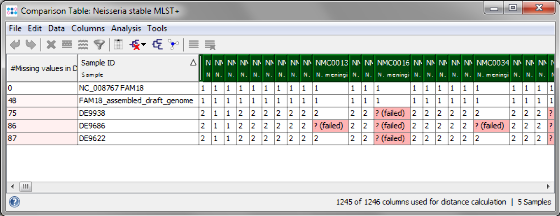
- Step 9: The comparison table is opened and shows the data for the three Samples. The columns with a green header are used for distance calculation. Table cells with red background contain missing values. Those appear if a MLST+ target was not found at all in an input sequence ("? (missing)"), or if the analysis for this target has failed, e.g., because of a frame shift error ("? (failed)").
- Step 10: Press the
 Minimum Spanning Tree button in the toolbar to calculate the distances between the Samples and draw a minimum spanning tree for them. If the table contains missing data (targets that have no allele types assigned yet), the columns can be automatically removed from distance calculation by selecting Remove Columns from Distance Calculation.
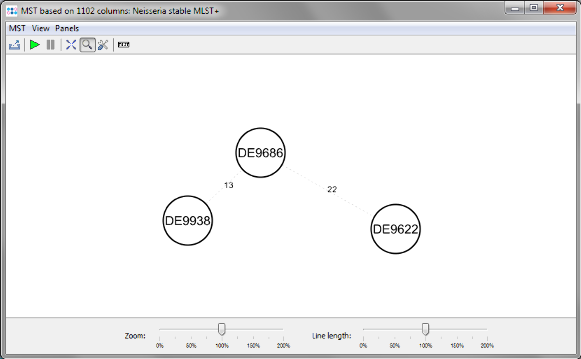
- The final minimum spanning tree shows allele distances between the three outbreak strains which are lower than the ones that can be calculated with the rapid ad hoc MLST+ schema.