

Contents
1 Overview
This tutorial describes how to use the Ridom SeqSphere+ software to perform spa-typing for Staphylococcus protein A gene Sanger sequencing data (i.e., chromatogram files).
2 Preliminaries
- Step 1: This tutorial requires a running SeqSphere+ client and server with version 7.2 or later. Start the SeqSphere+ server, then start the SeqSphere+ client and initialize the database. For evaluation purpose a free evaluation license can be requested.
- Step 2: Download the example data archive SeqSphere_Examples_Sanger_S_aureus_spa.zip for this tutorial, and extract the zip-file on your computer. The example data contains Sanger/CE sequencing data of S. aureus for the spa gene.
3 Creating Project with Epi Database Scheme and Task Template
- Step 1: Create a new project with the menu function: File | New | Create Project.
- Step 2: Enter a name for the new project in the field Project Name (e.g., Spa Tutorial).
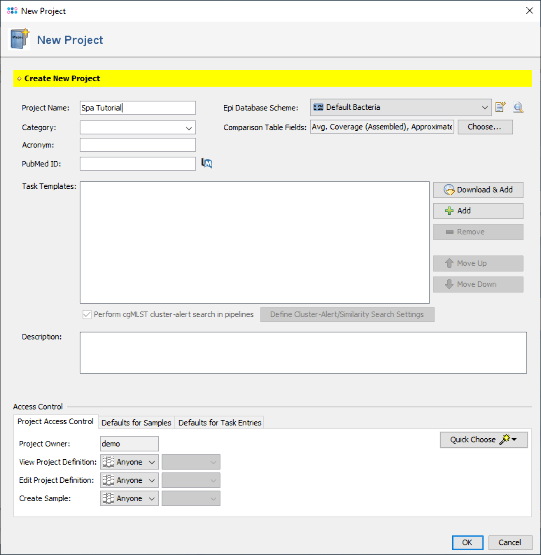
- Step 3: Press the button
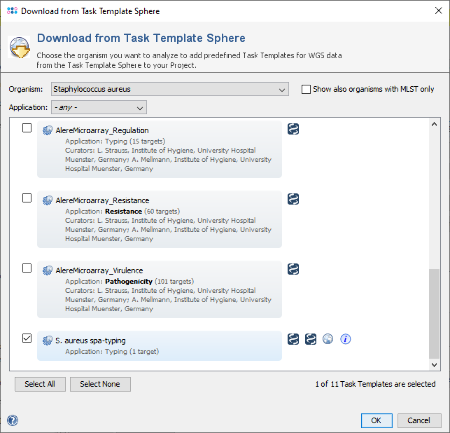
 Download & Add in the Task Templates section to open the Task Template Sphere. Select Staphylococcus aureus as organism and press the button Select None as the preselected Task Templates can only be used for WGS data. Now select the Task Template S. aureus spa-typing and confirm with OK (SeqSphere+ version 7.2 or later is required).
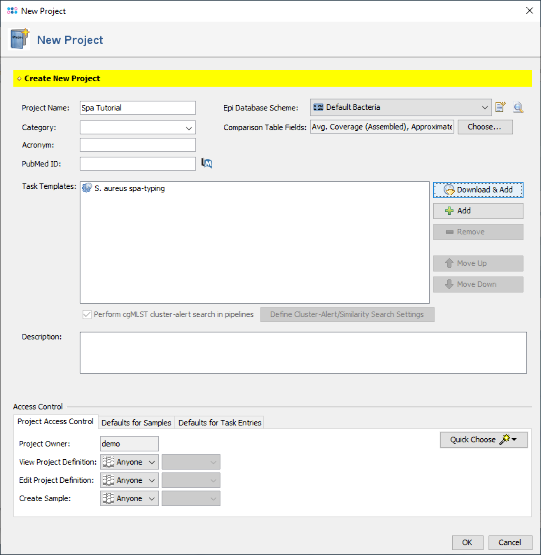
- Step 4: The Task Template is now added to the new project. Press OK to store the project.
- Ridom SeqSphere+ is a resequencing software. Once you have setup a project like this you can literally analyze hundreds/thousands of sequence data automatically.
4 Processing the Sequence Data
- Step 1: Choose from the menu File | Process Sanger Sequencing Data.
- Step 2: Press the
 button above the file browser panel on the left, and choose the directory where you extracted the tutorial example data.
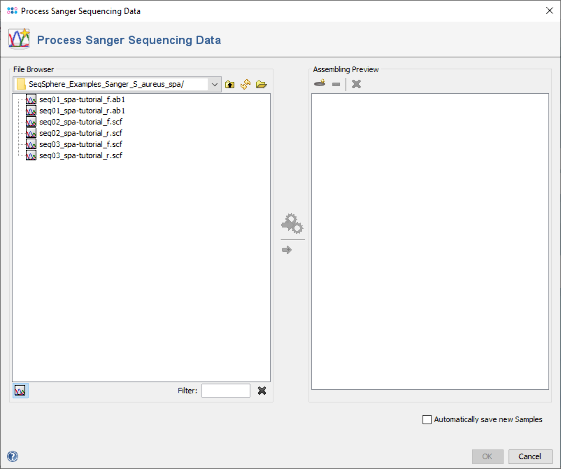
- Step 3: Select the tutorial example data directory or all of the chromatogram files in it, and press the button
 (Hint: Use CTRL+A to select all files in the directory).
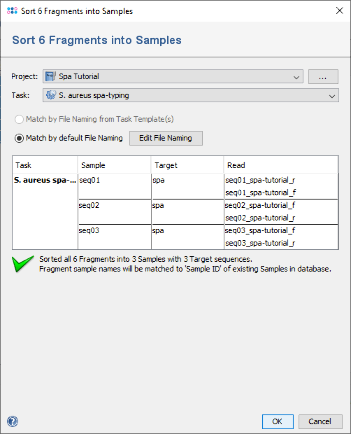
- Step 4: In the upcoming preview dialog select the Project that was just created. The files are now sorted corresponding to their file names. For the tutorial example files, the file naming is detected automatically. Press OK to confirm the preview dialog.
- (If, for your own files, the file naming is not detected automatically, you can press the button Edit File Naming to adapt it to your files.)
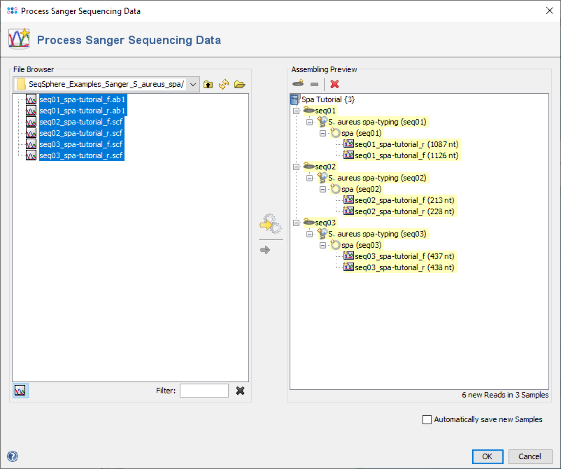
- Step 5: The 6 reads are now sorted into 3 Samples listed in the tree on the right. Each Sample has the Task Entry S. aureus spa-typing that contains the single target spa with the two chromatograms. Press OK to confirm the dialog and start the assembling.

- Step 6: The 3 Samples are now assembled one after the other. They are listed on the navigation tree in the left of the main window. Double-click on the Task Entry item
 S. aureus spa-typing (seq01) in the navigation tree of the first Sample seq01.
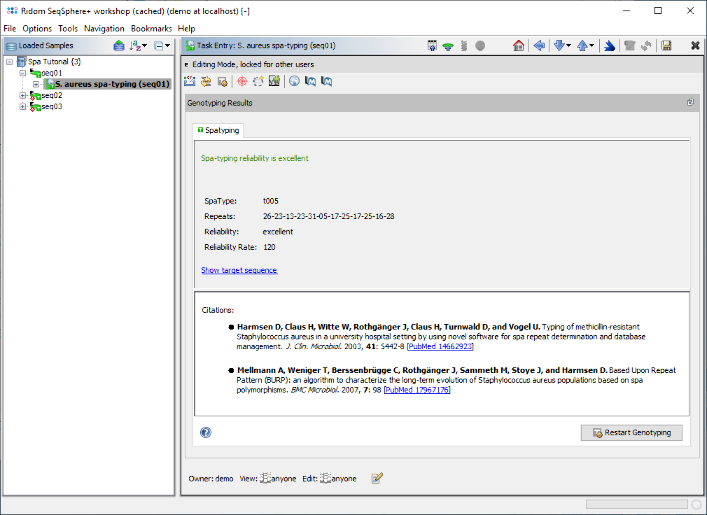
- Step 7: The spa-typing results are now shown in the right panel of the main window. Twelve spa-repeats were detected in the sequence (26-23-13-23-31-05-17-25-17-25-16-28) and both signatures were found at the correct position. The resulting spa-type is t005. No QC problems were found, therefore the panel shows the green message: "Spa-typing reliability is excellent". Click on the link "Show target sequence" to jump to the contig sequence.
- (If a new spa-type would be found, a submit button is shown on the bottom. New spa-types can only be submitted, if the reliability is good or excellent, i.e. rate > 100).
- (If the spa-typing is not possible or not reliable, the panel would show details about the detected QC problems and offers shortcut links to jump directly to the unreliable positions in the contig).
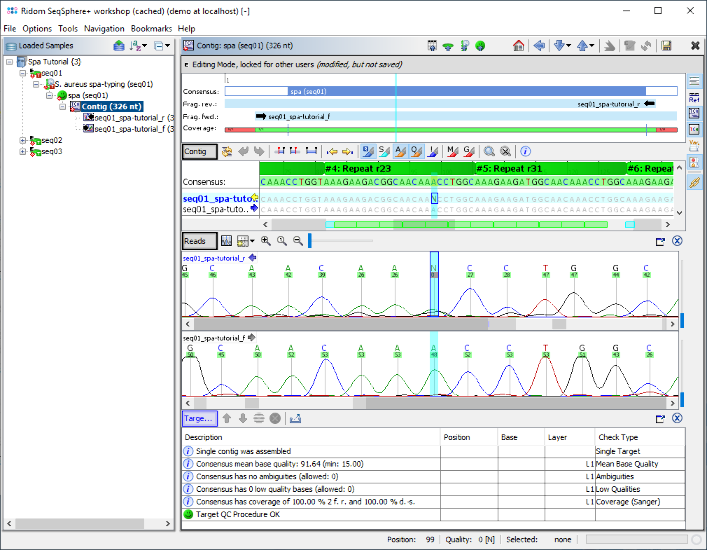
- Step 8: The contig editor is now opened, showing the consensus sequence and the two assembled chromatograms. The repeats that were found are highlighted green and labeled with the repeat ID. Both signatures were found correctly, and are therefore highlighted cyan.
5 Store and Retrieve Samples
- Step 1: Choose from the menu
 File | Save All to store the 3 Samples to the database on your SeqSphere+ server.
- Step 2: Choose File | Close All to remove the stored Samples from the workspace
- Step 3: Now choose
 File | Search Samples. Select the created Spa Tutorial project in the Project box and press the Search button.
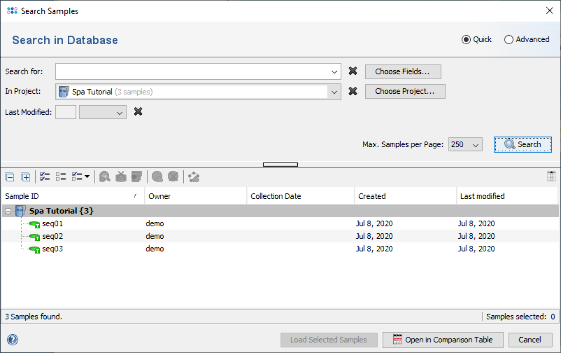
- Step 4: The 3 Samples that just were saved are listed. Now select the Advanced radio button in the upper right corner of the window.
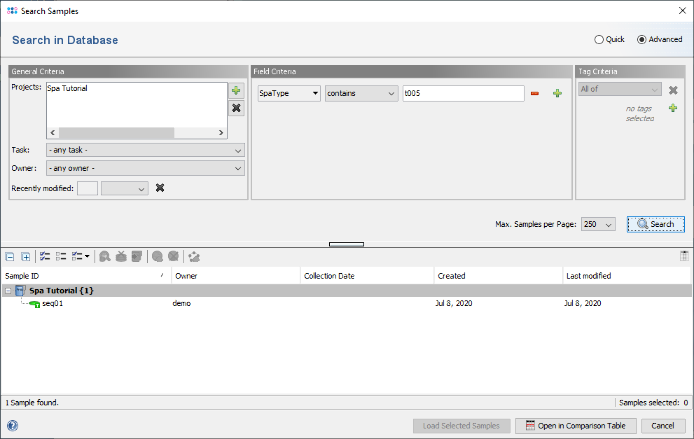
- Step 5: The window now shows the advanced search mask that can be used to search in specific fields (e.g., 'S. aureus spa-typing' SpaType = t005). Close the window by pressing the Cancel button.
6 Analyzing the Spa-Typing Results
- Step 1: Choose from the menu
 Tools | Comparison Table to perform phylogenetic analysis.
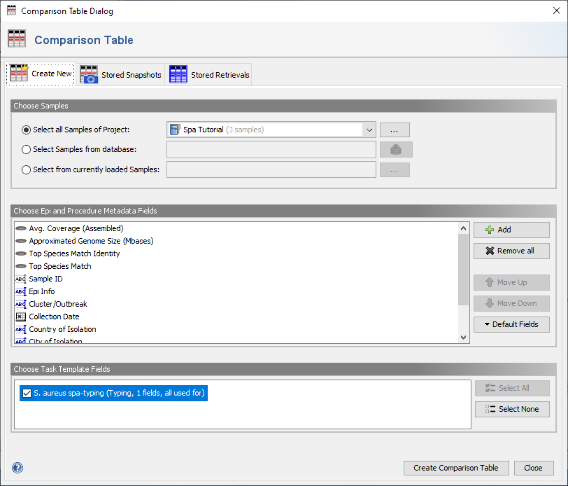
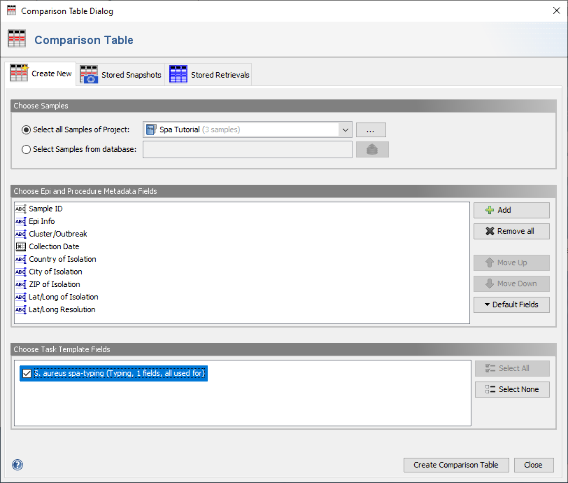
- Step 2: In the Comparison Table dialog go to the first tab "Create New". In the section Choose Samples select the project Spa Tutorial (should be preselected). In the section Choose Epi and Procedure Metadata Fields select the four fields at the top (Avg. Coverage, Approximated Genome Size, Top Species Match Identity, and Top Species Match) and press Remove to remove them from the list. Those fields are only used for WGS data, and are therefore not needed for analysing Sanger sequencing data. To store the updated list of fields, press the Default Fields and choose Store Current Fields as Project Defaults".
- Step 3: Now be sure to select S. aureues spa-typing in the section Choose Genotypings Schemes at the bottom (should be preselected). Press the Create Comparison Table button to confirm.
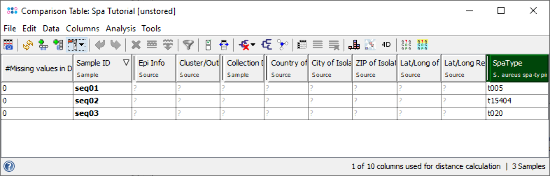
- Step 4: The comparison table window opens, showing the spa-type and some metadata fields. All epidemiological metadata fields are empty, because only sequence data was imported. Epi metadata can be entered in the Sample Overview and it can be imported from files
- Step 5: The comparison table can be used to create phylogenetic trees (neighbor-joining or UPGMA), to export the distance matrix for further usage (e.g., for SplitsTree), or to create minimum spanning trees. Press the
 Minimum Spanning Tree button in the toolbar to calculate and draw a minimum spanning tree for the 3 Samples.
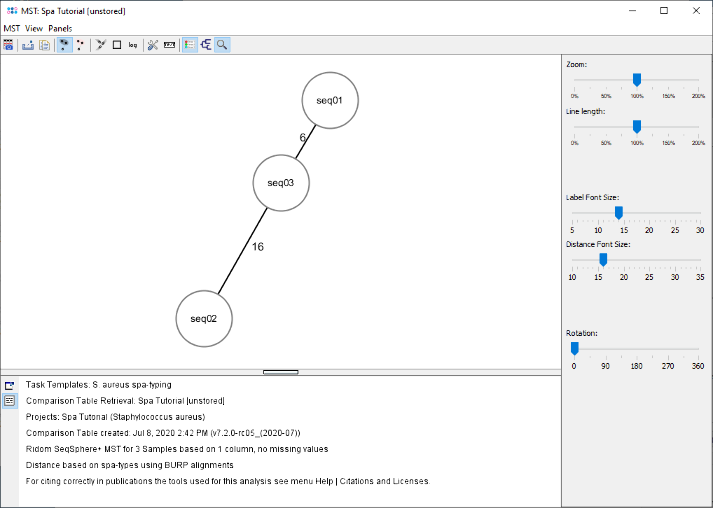
- Step 6: The minimum spanning tree window is opened. As the three Samples belong to different spa-types, three different nodes are shown. The number on the edges between the nodes show the distance between two spa-types, which are calculated based on the BURP algorithm.