

Contents
Preparation
- Define a Task Template for first-gen (Sanger) sequencing data
- Be sure to adjust the file naming conventions to the names of you read files
- Be sure to add the Task Template to a Project
Choose Input Files

Use the menu function ![]() File | Process Sanger Sequencing Data to open a dialog window.
File | Process Sanger Sequencing Data to open a dialog window.
The File Browser on the left shows a tree with all sub-directories of a root directory that is shown in the box above the tree.
The ![]() Choose Directory button can be used to change the root directory.
Choose Directory button can be used to change the root directory.
DNA Sequence files in SCF, ABI or FASTA file format are accepted.
By default only chromatogram files are shown in the browser. Use the ![]() Show only chromatogram files button to disable/enable this filter. The Filter text field allows to show only the file whose names contain the given text.
Show only chromatogram files button to disable/enable this filter. The Filter text field allows to show only the file whose names contain the given text.
Assembling Preview
The Assembling Preview on the right side is used to arrange reads into different Samples, Task Entries and targets before performing the assembling. The ![]() Create Sample command in the toolbar above this list can be used to create new Samples manually.
Create Sample command in the toolbar above this list can be used to create new Samples manually.
Use the file browser to navigate to your sequence files or to an upper directory, and select the files or the directory to which they belong to.
Sort Reads into Targets
Press the button ![]() Sort Reads into Samples between the file browser and the assembling preview,
to start the automatic sorting of reads into Samples.
Sort Reads into Samples between the file browser and the assembling preview,
to start the automatic sorting of reads into Samples.
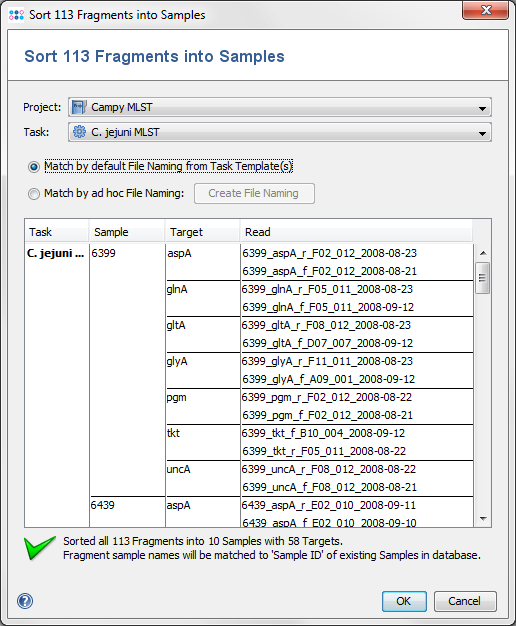
A new dialog window will appear. Select the Project to which the sequences should be added. The task selection can normally be left to automatically. According to the file naming conventions, the software now tries to sort the read files into Samples, Task Entries and targets. The result is shown in the preview table: each row stands for one read file.
By default the file naming conventions are taken from the selected Task Template. To use other file naming conventions, select Match by ad hock File Naming and press the Create File Naming button to define a new file naming on the fly.
If the sorting was successful, click the OK-button to create the previewed Samples.
Control the Result
The assembling preview panel shows a preview of the Samples to which the sorted reads will be added.
If the sample name that was extracted from the file name of a read file matches an existing Sample in the selected Project, then the read is added to this Sample. Read files can thus be added to existing Samples by using corresponding file names.
The result list on the right shows the newly added reads highlighted yellow, and the already existing reads highlighted blue.
Clicking the OK-button starts the assembling process and opens the Samples in the main window.