Contents
Overview
This tutorial describes how to use the Ridom SeqSphere+ software to analyze plasmids with PacBio long-read data using the MOB-suite tool and Mash plasmid typing.
Please Note: Mash Plasmid Typing requires the Long-read Data Plasmid Transmission Analysis Module
Preliminaries
- The Long-read Data Plasmid Transmission Analysis Module is required for this tutorial
- Installation of SeqSphere+: If SeqSphere+ is not available yet, a one-month trial version can be requested. The SeqSphere+ Client and Server software can be installed on the same computer for this tutorial. If you are completely new to SeqSphere+, we recommend to start first with the Tutorial for SeqSphere+ Assembly and cgMLST Analysis Pipeline.
- System Requirements: This tutorial requires at least 8 GB RAM and Windows with an installed Windows Subsystem for Linux (WSL) or a Linux system.
- Tutorial Data: Download the example data archive SeqSphere_Examples_Long_Read_Plasmid_Tutorial.zip (~4 MB) for this tutorial and extract the zip-file on your computer.
This zip-file contains FASTA data for the two strains published by van Almsick et al. (Microorganisms 10: 2022) produced with Pacific Biosciences sequencing (PacBio; HiFi v.3; de novo assembly and following data processing with SMRTLink v. 11). The data was produced at the Univ. Münster, Germany. To demonstrate the import of PacBio run details some artificial run info files were added to the PacBio example data folder. The manuscript describes a presumable intra-host horizontal transfer of a IncFIA resistance plasmid from K. quasipeumoniae to E. coli with a triplication of the resistance cassette that contains blaCTX-M 27 flanked by IS26s, which resulted in an increased MIC.
Create a Mash plasmid typing
- Step 1: Start SeqSphere and log in with your account data.
- Step 2: From the menu select File > New > Create Task Template
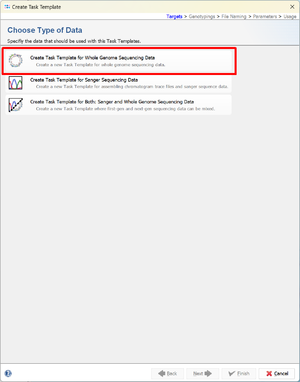
- Step 3: A window will open. Select Create Task Template for Whole Genome Sequencing Data.
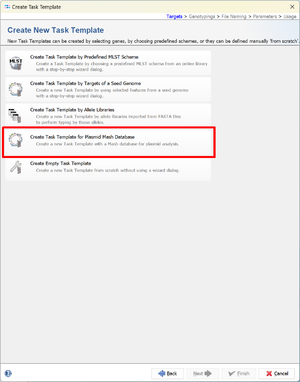
- Step 4: Select Create Task Template for Plasmid Mash Database from the next page.
- Step 5: The default settings will create a Mash plasmid databases that is only used for plasmids that are carrying priority AMR targets. The database will not be used for short-read data (hence the checkbox Ignore Samples with more than 30 contigs is checked). The default settings for the Mash plasmid database are fine, no changes are required. Click Next.
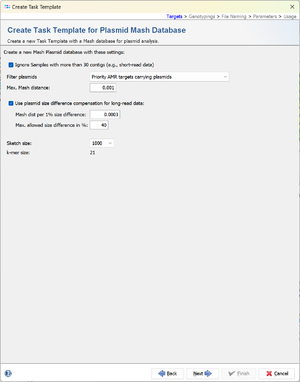
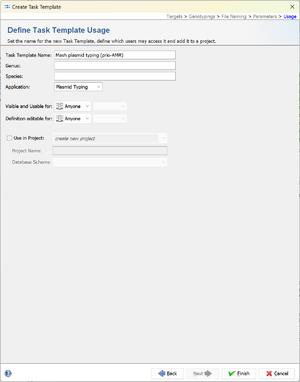
- Step 6: Enter a name for the Task Template, e.g. Mash plasmid typing (prio-AMR) and click Finish.
Define Projects
- Step 1: For this tutorial two Projects must be created. Invoke in the menu Options | Projects.
- Step 2: In the upcoming Projects window, press the
 Create new Project icon in the toolbar to start defining a new project.
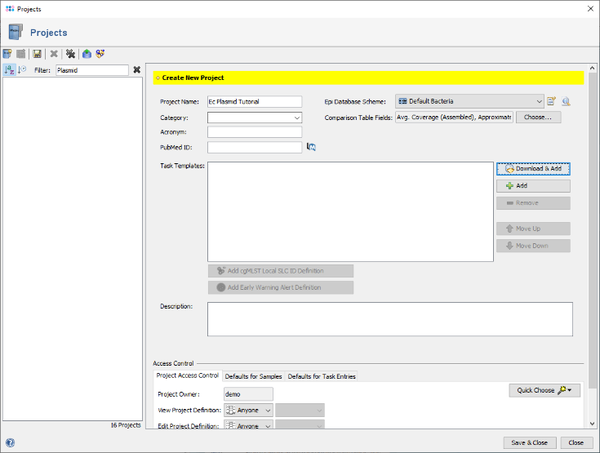
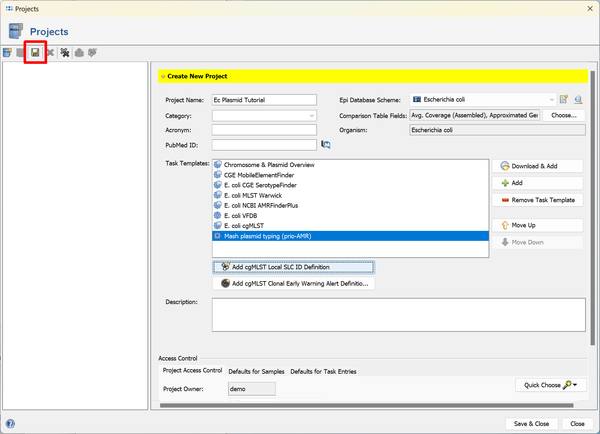
- Step 3: Enter a name for the new Project, e.g., Ec Plasmid Tutorial. Then press
 Download & Add in the Task Templates section to browse the Task Template Sphere.
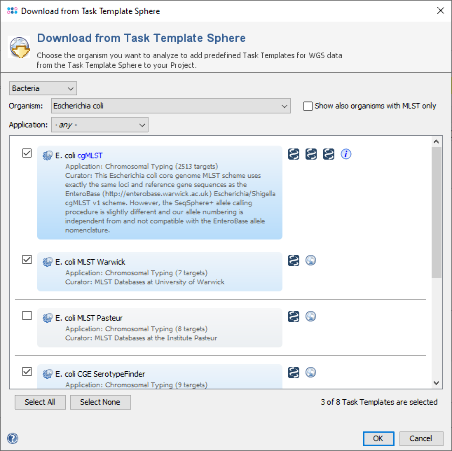
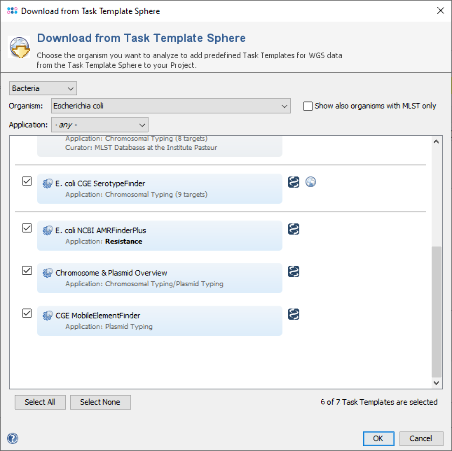
- Step 4: The Task Template Sphere provides all predefined public Task Templates. Choose as organism Escherichia coli. There are eight Task Templates listed, three of them are preselected. Scroll to the bottom of the list, and select also the four Task Templates NCBI AMRFinderPlus, VFDB, Chromosome & Plasmids Overview, and CGE MobileElementFinder by marking the checkboxes left of them. Thhe NCBI AMRFinderPlus task template is used to detect antimicrobial resistance-specific genes. The Chromosome & Plasmids Overview and the CGE MobileElementFinder task template are used to reconstruct and characterize plasmids and mobile genetic elements, respectively. The either chromosomal or plasmid location of virulence factors and antimicrobial resistance genes are in addition shown in the Chromosome & Plasmids Overview Task Template.
 Hint: For retrieving the newest MLST profiles, a registration at PubMLST.org is required.
Press OK to confirm the dialog with the seven selected Task templates.
- Step 5: Click the button
 Add to and select the Task Template for Mash plasmid typing that was created in the previous section.

- Step 6: The eight Task Templates are now added to the new Project. Press the
 Save icon to store the Project.
- Step 7: Now press again the Create new Project icon in the toolbar to define a second project. Enter a name again, e.g., Kp Plasmid Tutorial. Then press again Download & Add in the Task Templates section.
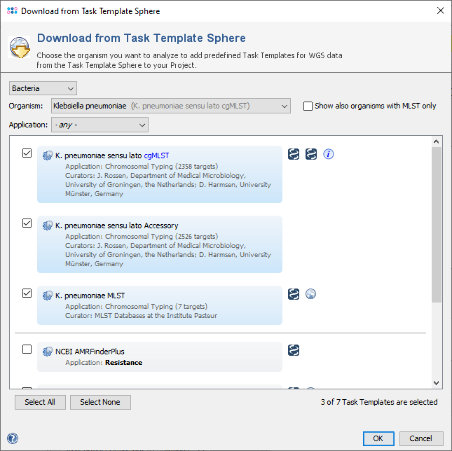
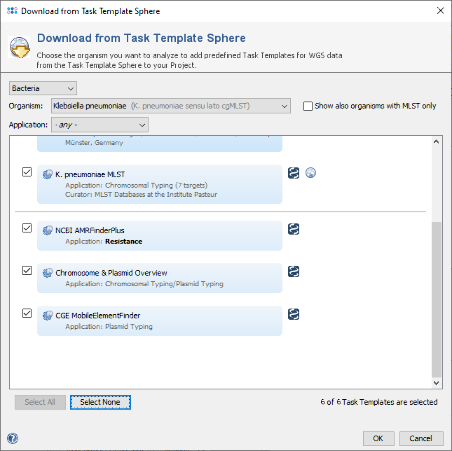
- Step 8: Choose as organism now Klebsiella pneumoniae. There are seven Task Templates listed, three of them are preselected. This time you can just press the Select All button at the bottom of the window to choose all seven Task Templates. Press OK to confirm the dialog and add the Task Templates to your Project.
- Step 9: Click the button Add to and select the Task Template for Mash plasmid typing that was created in the previous section. Press OK to confirm the dialog.
- Step 10: Finally press the button Save & Close to store also the second Project and to close the dialog.
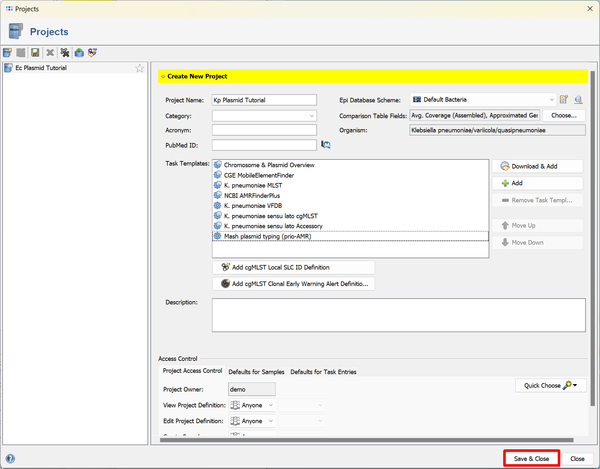
- Step 11: The Projects are defined now.
Define an Early Warning Alert for the Mash plasmid typing
The Early warning alerts (EWA) for plasmid databases can span over multiple Projects. They are defined for Task Templates in an own window that allows managing the plasmid databases
- Step 1: Select Options > Mash Plasmid databases from the menu.
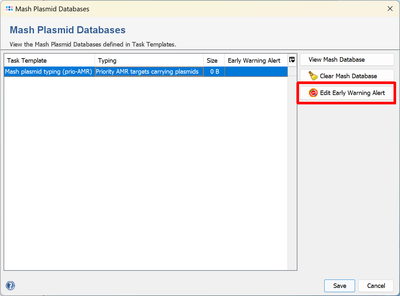
- Step 2: Select the in the previous section defined Mash plasmid typing and click Edit Early Warning Alert.
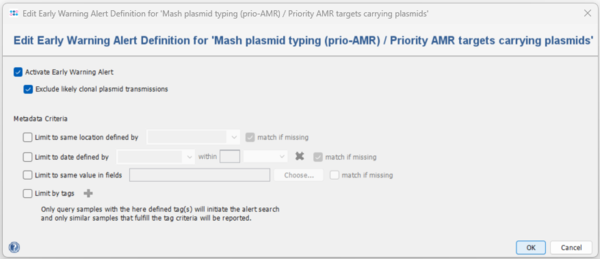
- Step 3: In the next window, click the box next to Activate Early Warning Alert. Leave the other settings at the defaults.
Then click two times OK to close both managing dialog windows.
- Step 4: The EWA for the plasmid database is now activated and will be checked whenever a pipeline is run with a Project that contains the Task Template Mash plasmid typing (prio-AMR).
- Continue with the pipeline script definition by invoking in the menu File | Logout & Start Pipeline Mode.
Define and Run Pipeline Script
- Step 1: Press Create New Script to open a dialog for creating a new pipeline script.
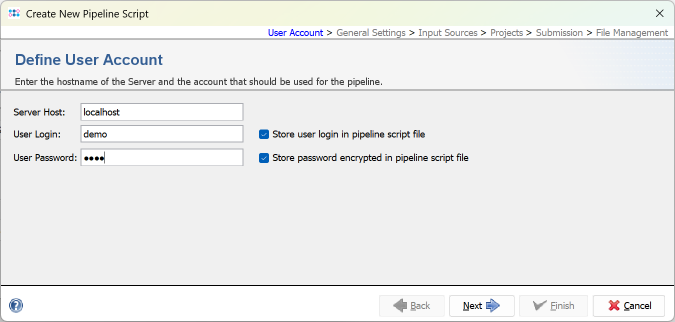
In the first step the Server Host and the User Login must be defined. Just use localhost for your local computer and the same SeqSphere+ user account that you are normally using for the SeqSphere+ login. The option to store user login in the pipeline script is enabled by default. Below enter the User Password of this user account. If wanted, the password can also be stored (encrypted) in the pipeline script. Press Next to move on.
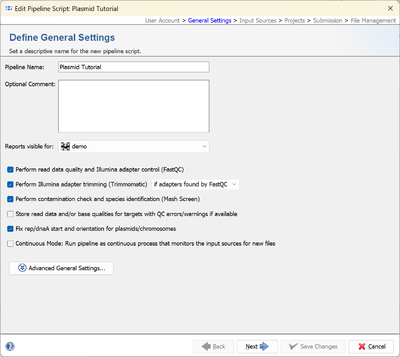
- Step 2: In the Define General Settings panel enter a Pipeline Name (e.g., Plasmid Tutorial). Leave everything else to default and press Next to move on.
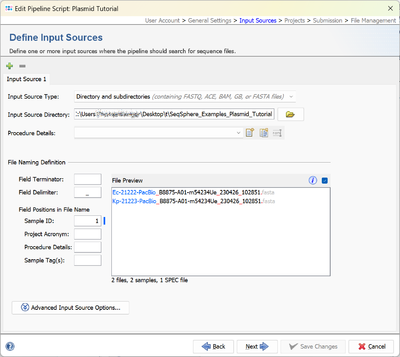
- Step 3: In the next panel the Input Sources for the WGS sequence data are selected.
The Input Source Type is preset to Directory. Change this to Directory and subdirectories. Press the button in the directory field below, and select the directory SeqSphere_Examples_Long_Read_Plasmid_Tutorial that was unpacked from the downloaded tutorial data file (see Preliminaries). Enter as Field Delimiter the underscore character "_" to shorten the Sample IDs. The File Preview on the lower right should show the two FASTA files with the Sample IDs highlighted in blue. The Procedure Details can be left empty for this tutorial. The Sequencing Vendor for the example data is set automatically by predefined procedure details files that come with the example data.
- Press Next to move on.
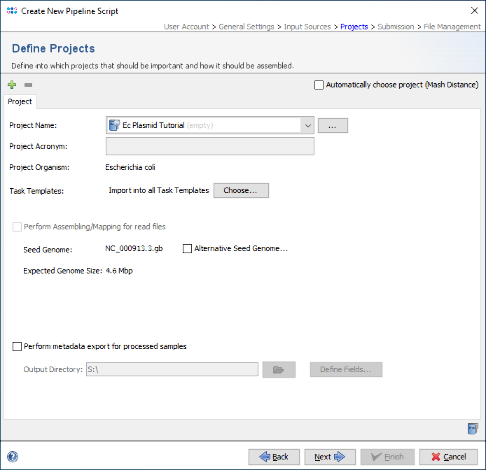
- Step 4: In the Define Projects panel choose one of the newly created projects, i.e., Ec Plasmid Tutorial.
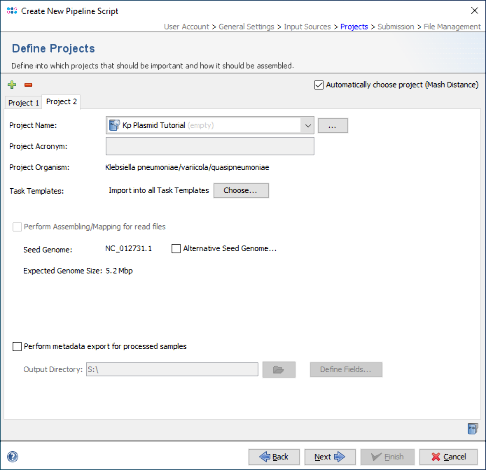
- Step 5: As two different species will be processed by this pipeline, select the checkbox Automatically choose project (Mash Distance) at the top of the panel, to detect the Project for each FASTA file automatically by a Mash search against a reference database. Then press the Add Project button and choose the second above created Project, i.e., Kp Plasmid Tutorial.
- Press Next to move on.
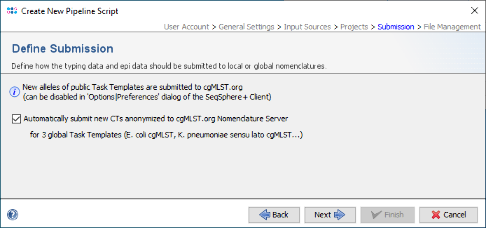
- Step 6: In the Define Submission panel the checkbox to submit new CTs to the public cgMLST Nomenclature Server (cgMLST.org) is already preselected.
- Press Next to move on.
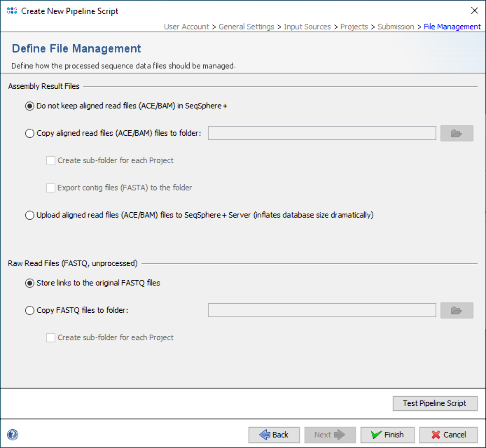
- Step 7: Finally, in the Define File Management panel leave all to default and press Finish to store the new pipeline script.
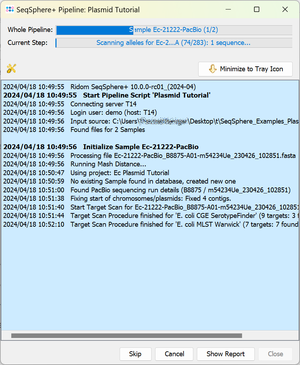
- Step 8: Now press the button
 Start Script to run the pipeline.
Plasmid Early Warning Alert
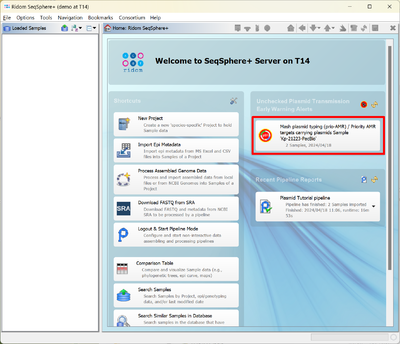
- Step 1: After the pipeline has finished restart SeqSphere+ in interactive mode and log in.
- Step 2: To view the Plasmid Early Warning Alert (EWA) select the box in the Unchecked Plasmid Transmission Early Warning Alerts area on the welcome page.
- Step 3: Select the first list entry and click the button Show Samples of Alert. This will open a plasmid table that contains all plasmids within this alert.
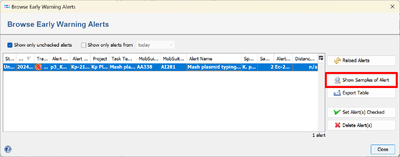
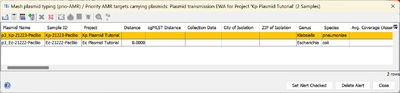
- The yellow marked row is the plasmid that triggered the EWA, the other rows contain the plasmids with a close distance to the first plasmid.
- The EWA is triggered here by the plasmid transmission between the E. coli and the K. pneumoniae Samples (the direction of transmission can only inferred from the collection dates).
- Step 4: To view a visualization using pyGenomeViz for the similar plasmids, select both rows in the table and click the button
 Visualize Plasmids with pyGenomeViz. This will open a browser window with a graphical representation of the two plasmids:
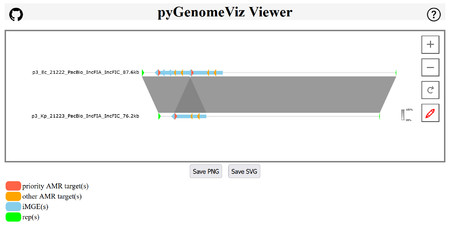
- The two IncFIA resistance plasmids of the K. quasipeumoniae and E. coli are shown. Clearly the triplication of the resistance cassette (iMGE) that contains blaCTX-M 27 flanked by IS26s can be seen. The two plasmids are aligned nicely as both plasmids are circular and therefore could be re-orientated and the start could be fixed using the reps by the accordingly checked pipeline script option.
Analyze Results in Detail
- Step 1: Close the EWA window.
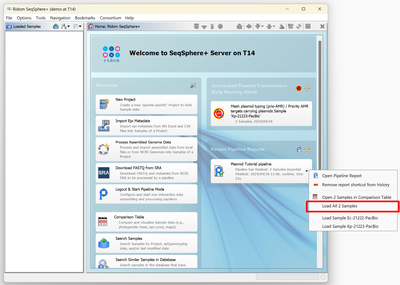
- Step 2: The welcome panel shows a notfication for the finished pipeline. Click in the right part of this notification on the
 dropdown icon, and choose in the upcoming menu the option Load All 2 Samples.
- Step 3: The two Samples are now in the navigation tree. Double-click on the first Sample, the E. coli PacBio Sample Ec-21222-PacBio, to open it in the right panel. Then click on the tab Procedure to see the procedure details for this sample.
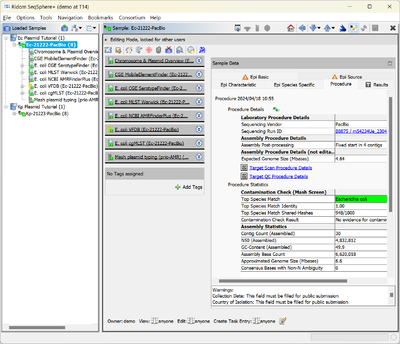
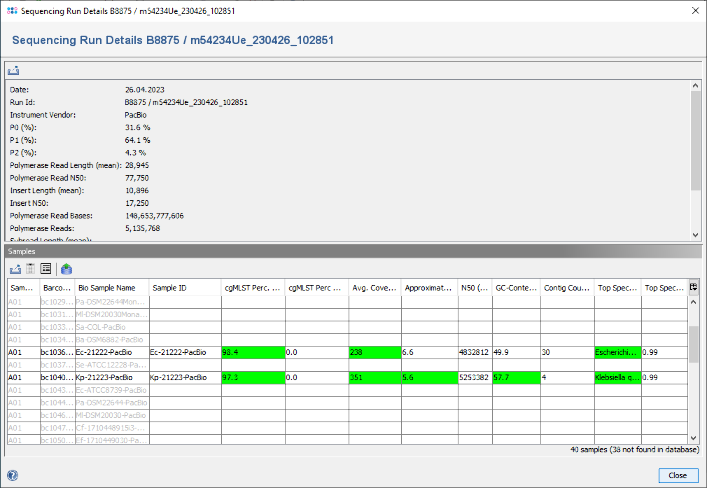
- Step 4: The Procedure Details table contains a link in the line Sequencing Run ID. Click on this link. The PacBio run details are shown that were imported automatically from the accompanying files in the PacBio folder. In the table below it can be seen that only two PacBio samples were imported from this run. The QC related fields are highlighted in green, there are no warnings.
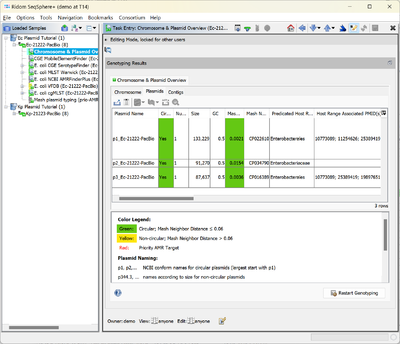
- Step 5: Now close the run info window, and open the Chromosome & Plasmid Overview Task of this Sample. The table shows plasmids that were found/reconstructed by MOB-suite; hereby each row represents a single plasmid and in this case all three plasmids were circular. The column AMRFinderPlus Targets shows that blaCTX-M-27 was found multiple times by AMRFinderPlus in the third plasmid. blaCTX-M-27 is highlighted in red because it is categorized as a priority target. MOB-suite assigned for this 87.6 kb sized plasmid the Secondary Cluster ID AI281. Finally, MobileElementFinder found that this AMR target is part of two nested integrative mobile genetic elements (iMGEs): ISSbo1 and IS26.
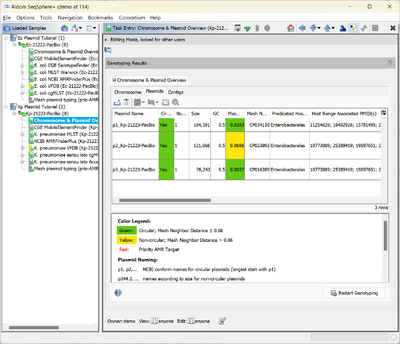
- Step 6: Now open the Chromosome & Plasmid Overview for the second Sample in the list, i.e., the K. pneumoniae PacBio Sample Kp-21223-PacBio. The table shows that a single copy of blaCTX-M-27 was found again on the third circular plasmid that is about 11.4 kb shorter than its E. coli pendant. The Secondary Cluster ID is the same as the one of the E. coli plasmid: AI281.
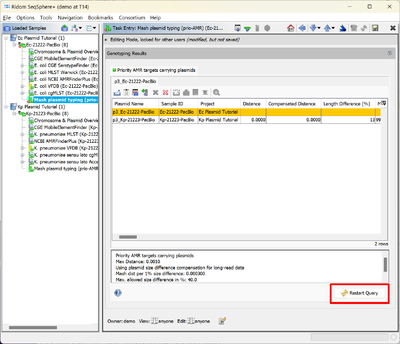
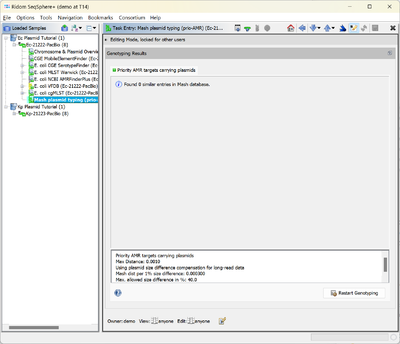
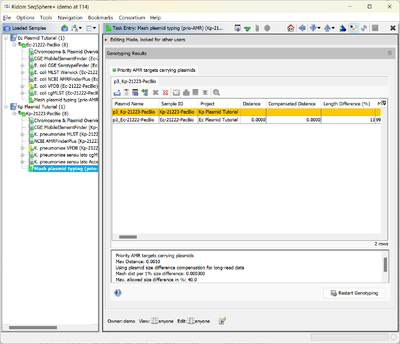
- Step 7: To view the results of the comparison with the Mash plasmid database open the Task Entry Mash plasmid typing (prio-AMR).
- The Samples are compared one after another with the Mash plasmid database. For each Sample all plasmids that contain priority-AMR genes are added to the Mash plasmid database. Therefore, for the first entered in the database, i.e., Sample Ec-21222-PacBio, the Mash plasmid database is empty and no hit is found and stored in the Mash plasmid typing (prio-AMR) Task Entry.
- Step 8: For the Sample Kp-21223-PacBio a hit is found with a plasmid from the previously processed Sample Ec-21222-PacBio. The query plasmid is displayed as a row with a yellow background, the hit is displayed in the next row. The table displays the Mash distance, the compensated distance (with correction for plasmid size differences), and the columns that are also displayed in the Task Entry Chromsome & Plasmid Overview. The table suggest a plasmid-transmission from the E. coli to the K. pneumoniae Samples or vice versa.
- Step 9: If the Mash plasmid typing is reprocessed for Sample Ec-21222-PacBio (using the button Restart Query) it will now report a hit with a plasmid from Kp-21223-PacBio, because the database is now not empty anymore but contains the prio-AMR carrying plasmid from the Klebsiella already.